Tagged: VMware vSphere
Moving a VMware Horizon View virtual desktop between separate Horizon View environments
Requirements:
Sometimes you may build two distinct VMware Horizon View environments for separate business units, for Disaster Recovery, or for testing purposes.
In that case, a need may arise to move a virtual desktop between the independent Horizon View infrastructures.
Assumptions:
There are many ways Horizon View may be configured. However, this article assumes the following settings in both environments:
- Manual, non-automated, dedicated pools for virtual desktops
- Full clone virtual desktops
- All user data is contained inside the virtual desktop, most likely on drive C
- All virtual desktop disks (vmdks, C and others) are contained within the same VM directory on the storage
- Storage is presented to ESXi through the NFSv3 protocol
- Microsoft Active Directory domain is the same across both sites
- VLANs/subnets the same or different between the two sites
- DHCP is configured for the desktop VM in both sites
- Virtual desktop has Windows 7 or Windows 10 operating system
- Connection Servers do not replicate between environments
- No Cloud Pod federation
- Horizon View v7.4
- vCenter VCSA 6.5 Update 1e
- ESXi 6.5 for some hosts and 6.0 Update 3 for other hosts
There are other ways to move a virtual desktop when the Horizon View is setup with automation and Linked Clones, but they are subject for a future article.
The first Horizon View infrastructure will be called “Source” in this article. The second Horizon View infrastructure, where the virtual desktop needs to be moved, will be called “Destination” in this article.
Instructions:
- Record which virtual desktop names are assigned to which Active Directory users on the Source side. You can do that by Exporting a CSV file from the Pool’s Inventory tab.
- If the Source Horizon View infrastructure is still available (not destroyed due to a disaster event), then continue with the following steps on the Source environment. If the Source Horizon View infrastructure has been destroyed due to a disaster, go to Step 9.
- Power off the virtual desktop. Ensure that in Horizon View Manager you don’t have a policy on your pool to keep powering the virtual desktop on.
- In Horizon View Manager, click on the pool name, select the Inventory tab.
- Right click the desktop name and select Remove.
- Choose “Remove VMs from View Manager only.”
- In vSphere Web Client, right click the desktop VM and select “Remove from Inventory.”
- Unmount the NFSv3 datastore that contains the virtual desktop from Source ESXi hosts.
- At this point how the datastore gets from Source to the Destination will vary based on your conditions.
- For example, for testing purposes, the NFSv3 datastore can be mounted on the Destination hosts.
- In case of disaster, there could be storage array technologies in place that replicate the datastore to the Destination side. If the Source storage array is destroyed, go to the Destination storage array and press the Failover button. Failover will usually make the Destination datastore copy Read/Write.
- Add the NFSv3 datastore that contains the virtual desktop to the Destination ESXi hosts, by going through the “New Datastore” wizard in vSphere Web Client.
- Browse the datastore File structure. Go to the directory of the virtual desktop’s VM, find the .vmx file.
- Right click on the .vmx file and select “Register VM…”
- Leave the same name for the desktop VM as offered by the wizard.
- Put the desktop VM in the correct VM folder and cluster/resource pool, that is visible by the Destination’s Horizon View infrastructure.
- Edit the desktop VM’s settings and select the new Port Group that exists on the Destination side (if required).
- Power on the desktop VM from the vSphere Web Client.
- You might get the “This virtual machine might have been moved or copied.” question.
- When vSphere sees that the storage path of the VM does not match what was originally in the .vmx file, you might get this question.
- Answering “Moved” keeps the UUID of the virtual machine, and therefore the MAC address of the network adapter and a few other things.
- Answering “Copied” changes the UUID of the virtual machine, and therefore the MAC address of the network adapter and a few other things.
- In the majority of cases (testing, disaster recovery), you will be moving the desktop virtual machine from one environment to another. Therefore, answer “I Moved It,” to keep the UUID and thus the MAC address the same.
- Wait until the desktop virtual machine obtains the IP address from the Destination’s DHCP server, and registers itself with the DNS server and Active Directory.
- Remember, we are assuming the same Active Directory domain across both sites. As a result, the desktop VM’s AD computer name and object will remain the same.
- Monitor the IP address and DNS assignment from the vSphere Web Client’s Summary tab for the desktop VM.
- In Destination’s Horizon View Manager, click on the Manual, Full Clone, Non-automated, Dedicated pool that you have created already.
- If you did not create the pool yet, create a new pool and put any available VM at the Destination in the pool. The VM that you put will just be a placeholder to create the pool. Once the pool is created, you can remove the placeholder VM and only keep your moved virtual desktops.
- Go to the Entitlements tab and add any user group or users to be entitled to get desktops from the pool. Most likely, it will the the same user group or user that was entitled to the pool on the Source side.
- Select the Inventory tab and click the Add button.
- Add the desktop VM that you just moved.
- Check the status of the desktop VM. First, the status will say “Waiting for agent,” then “In progress,” then “Available.”
- Right click on the desktop VM and select Assign User.
- Select the correct Active Directory user for the desktop.
- As the user to login to the virtual desktop using Horizon View Client or login on behalf of the user.
- For the first login after the move, the user may be asked by Windows to “Restart Now” or “Restart Later.” Please direct the user to “Restart Now.”
- After the restart, the user may utilize the Horizon View Client to login to the Destination’s moved desktop normally.
Exchange 2010-2016 Database Availability Group (DAG) cluster timeout settings for VMware
Symptom:
Exchange 2010-2016 Database Availability Group (DAG) active database moves between DAG nodes without any reason, when the DAG nodes are VMware Virtual Machines. This may be due to the DAG node being VMotioned by vSphere DRS cluster.
Solution:
The settings below allow you to VMotion without DAG active databases flipping between nodes for no reason.
Although the tip below is mainly useful for Multi-Site DAG clusters, I have seen this flipping happen even within the same site. So, the recommendation is to do these commands on ANY DAG cluster that is running on VMware.
Instructions:
Substitute your DAG name for an example DAG name below, yourDAGname or rpsdag01.
On any Mailbox Role DAG cluster node, open Windows PowerShell with modules loaded.

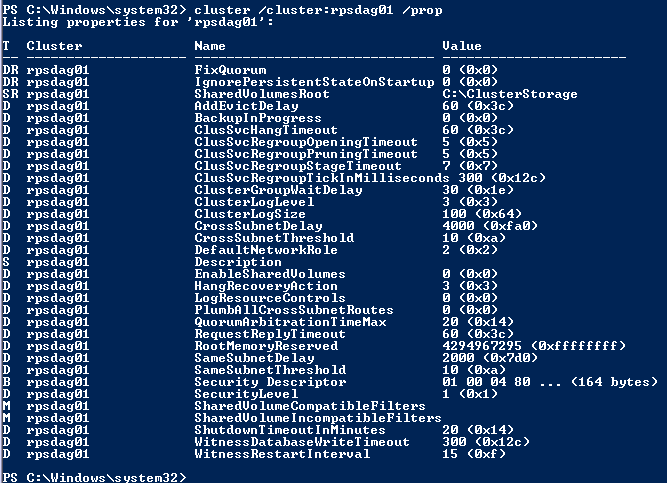
| Type the following command to check current settings:
cluster /cluster:yourDAGname /prop Note the following Values: SameSubnetDelay SameSubnetThreshold CrossSubnetDelay CrossSubnetThreshold |

| Type the following commands to change the timeout settings.
cluster /cluster:yourDAGname /prop SameSubnetDelay=2000 cluster /cluster:yourDAGname /prop SameSubnetThreshold=10 cluster /cluster:yourDAGname /prop CrossSubnetDelay=4000 cluster /cluster:yourDAGname /prop CrossSubnetThreshold=10 |

Type the command to check that settings took
cluster /cluster:yourDAGname /prop
You ONLY need to run this on ONE DAG node. It will be replicated to ALL the other DAG nodes.
More Information:
See the article below:
http://technet.microsoft.com/en-us/library/dd197562(v=ws.10).aspx
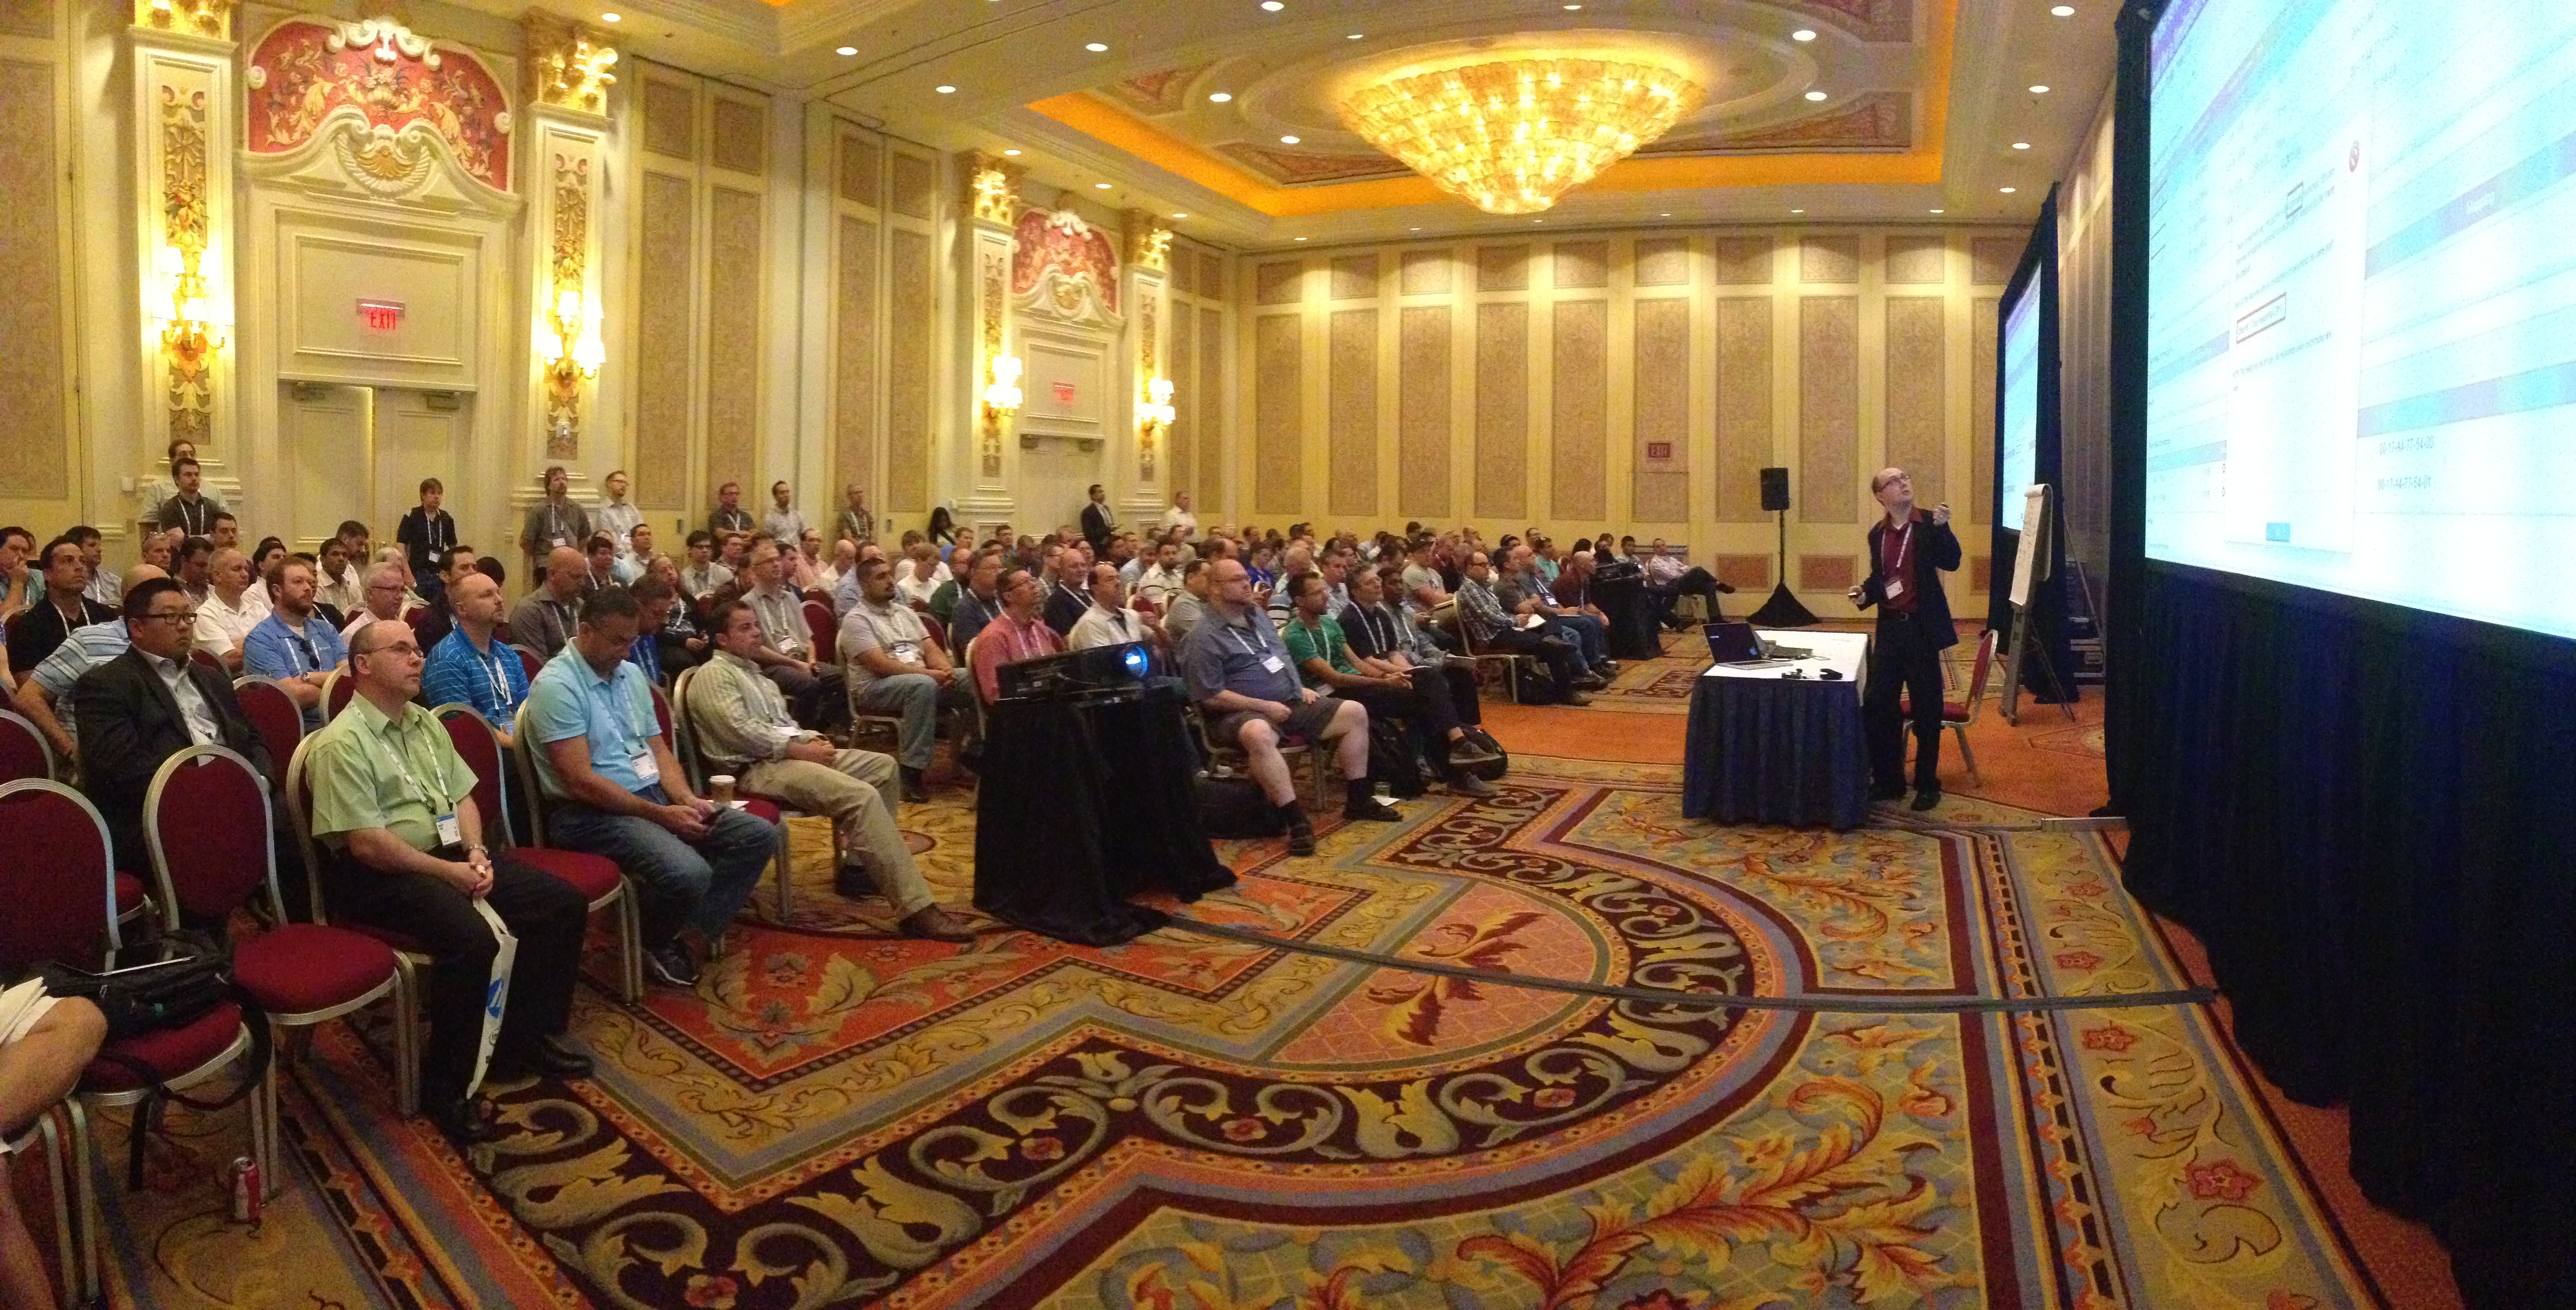
Collateral for my presentation at the New Jersey VMware User Group (NJ VMUG)
I was delighted at the chance to present at the New Jersey VMware User Group (NJ VMUG). The attendees posed excellent questions.
Thank you much to Ben Liebowitz for the invitation.
My presentation is called “Virtual Desktop (VDI) Performance Troubleshooting”
Here are the slides for the session:
Virtual Desktops (VDI) on an Airplane
Recently, while flying on United Airlines I noticed the WiFi sign on the seat in front. I never used WiFi on planes before, so I thought it would be expensive. Imagine my surprise when it was cheap. It was probably cheap to compensate the absence of TV displays.
I immediately thought of our CDI Virtual Desktop (VDI) lab in Teterboro, NJ (USA). Would the Virtual Desktop even be usable? How will video run? I connected immediately, started recording my screen and opened my Virtual Desktop. It worked! Everything except video worked well.
My idea came because of Michael Webster, who has already tried doing this and wrote about it. I also wanted to do it in the Gunnar Berger style of protocol comparison. So, for your viewing pleasure — Virtual Desktops (VDI) on an Airplane.
——
Description:
This video is a demonstration of the Virtual Desktop (VDI) technology, located at CDI in Teterboro, NJ (USA) being accessed from an airplane 34,000 feet (10 km) high. Virtual Desktops allow you to use your Windows desktop from anywhere — even on satellite based WiFi. You will see PCoIP and HTML5 tests, Microsoft Word, HD video, YouTube video and vSphere client utilization.
Demonstration: Yury Magalif.
Lab Build: Chris Ruotolo.
Connecting From: Random clouds above Missouri, USA
Equipment and Software used:
VMware View
VMware vSphere
Cisco C-series servers.
EMC XtremIO all flash storage array.
10Zig Apex 2800 PCoIP acceleration card with a Teradici chip.
Inspired by:
Michael Webster’s blog article:
The VMware View from the Horizon at 38,000 Feet and 8000 Miles Away
Gunnar Berger’s low-latency VDI comparison video:
VMware vSphere misidentifies local or SAN-attached SSD drives as non-SSD
Symptom:
You are trying to configure Host Cache Configuration feature in VMware vSphere. The Host Cache feature will swap memory to a local SSD drive, if vSphere encounters memory constraints. It is similar to the famous Windows ReadyBoost.
Host Cache requires an SSD drive, and ESXi will detect the drive type as SSD. If the drive type is NOT SSD, Host Cache Configuration will not be allowed.
However, even though you put in some local SSD drives on the ESXi host, and also have an SSD drive on your storage array coming through, ESXi refuses to recognize the drives as SSD type, and thus refuses to let you use Host Cache.
Solution:
Apply some CLI commands to force ESXi into understanding that your drive is really SSD. Then reconfigure your Host Cache.
Instructions:
Look up the name of the disk and its naa.xxxxxx number in VMware GUI. In our example, we found that the disks that are not properly showing as SSD are:
- Dell Serial Attached SCSI Disk (naa.600508e0000000002edc6d0e4e3bae0e) — local SSD
- DGC Fibre Channel Disk (naa.60060160a89128005a6304b3d121e111) — SAN-attached SSD
Check in the GUI that both show up as non-SSD type.
SSH to ESXi host. Each ESXi host will require you to look up the unique disk names and perform the commands below separately, once per host.
Type the following commands, and find the NAA numbers of your disks.
In the examples below, the relevant information is highlighted in RED.
The commands you need to type are BOLD.
The comments on commands are in GREEN.
———————————————————————————————-
~ # esxcli storage nmp device list
naa.600508e0000000002edc6d0e4e3bae0e
Device Display Name: Dell Serial Attached SCSI Disk (naa.600508e0000000002edc6d0e4e3bae0e)
Storage Array Type: VMW_SATP_LOCAL
Storage Array Type Device Config: SATP VMW_SATP_LOCAL does not support device configuration.
Path Selection Policy: VMW_PSP_FIXED
Path Selection Policy Device Config: {preferred=vmhba0:C1:T0:L0;current=vmhba0:C1:T0:L0}
Path Selection Policy Device Custom Config:
Working Paths: vmhba0:C1:T0:L0
naa.60060160a89128005a6304b3d121e111
Device Display Name: DGC Fibre Channel Disk (naa.60060160a89128005a6304b3d121e111)
Storage Array Type: VMW_SATP_ALUA_CX
Storage Array Type Device Config: {navireg=on, ipfilter=on}{implicit_support=on;explicit_support=on; explicit_allow=on;alua_followover=on;{TPG_id=1,TPG_state=ANO}{TPG_id=2,TPG_state=AO}}
Path Selection Policy: VMW_PSP_RR
Path Selection Policy Device Config: {policy=rr,iops=1000,bytes=10485760,useANO=0;lastPathIndex=1: NumIOsPending=0,numBytesPending=0}
Path Selection Policy Device Custom Config:
Working Paths: vmhba2:C0:T1:L0
naa.60060160a891280066fa0275d221e111
Device Display Name: DGC Fibre Channel Disk (naa.60060160a891280066fa0275d221e111)
Storage Array Type: VMW_SATP_ALUA_CX
Storage Array Type Device Config: {navireg=on, ipfilter=on}{implicit_support=on;explicit_support=on; explicit_allow=on;alua_followover=on;{TPG_id=1,TPG_state=ANO}{TPG_id=2,TPG_state=AO}}
Path Selection Policy: VMW_PSP_RR
Path Selection Policy Device Config: {policy=rr,iops=1000,bytes=10485760,useANO=0;lastPathIndex=1: NumIOsPending=0,numBytesPending=0}
Path Selection Policy Device Custom Config:
Working Paths: vmhba2:C0:T1:L3
———————————————————————————————-
Note that the Storage Array Type is VMW_SATP_LOCAL for the local SSD drive and VMW_SATP_ALUA_CX for the SAN-attached SSD drive.
Now we will check to see if in CLI, ESXi reports the disks as SSD or non-SSD for both disks. Make sure to specify your own NAA number when typing the command.
———————————————————————————————-
~ # esxcli storage core device list –device=naa.600508e0000000002edc6d0e4e3bae0e
naa.600508e0000000002edc6d0e4e3bae0e
Display Name: Dell Serial Attached SCSI Disk (naa.600508e0000000002edc6d0e4e3bae0e)
Has Settable Display Name: true
Size: 94848
Device Type: Direct-Access
Multipath Plugin: NMP
Devfs Path: /vmfs/devices/disks/naa.600508e0000000002edc6d0e4e3bae0e
Vendor: Dell
Model: Virtual Disk
Revision: 1028
SCSI Level: 6
Is Pseudo: false
Status: degraded
Is RDM Capable: true
Is Local: false
Is Removable: false
Is SSD: false
Is Offline: false
Is Perennially Reserved: false
Thin Provisioning Status: unknown
Attached Filters:
VAAI Status: unknown
Other UIDs: vml.0200000000600508e0000000002edc6d0e4e3bae0e566972747561
~ # esxcli storage core device list –device=naa.60060160a89128005a6304b3d121e111
naa.60060160a89128005a6304b3d121e111
Display Name: DGC Fibre Channel Disk (naa.60060160a89128005a6304b3d121e111)
Has Settable Display Name: true
Size: 435200
Device Type: Direct-Access
Multipath Plugin: NMP
Devfs Path: /vmfs/devices/disks/naa.60060160a89128005a6304b3d121e111
Vendor: DGC
Model: VRAID
Revision: 0430
SCSI Level: 4
Is Pseudo: false
Status: on
Is RDM Capable: true
Is Local: false
Is Removable: false
Is SSD: false
Is Offline: false
Is Perennially Reserved: false
Thin Provisioning Status: yes
Attached Filters: VAAI_FILTER
VAAI Status: supported
Other UIDs: vml.020000000060060160a89128005a6304b3d121e111565241494420
———————————————————————————————-
Now we will add a rule to enable SSD on those 2 disks. Make sure to specify your own NAA number when typing the commands.
———————————————————————————————-
~ # esxcli storage nmp satp rule add –satp VMW_SATP_LOCAL –device naa.600508e0000000002edc6d0e4e3bae0e –option=enable_ssd
~ # esxcli storage nmp satp rule add –satp VMW_SATP_ALUA_CX –device naa.60060160a89128005a6304b3d121e111 –option=enable_ssd
———————————————————————————————-
Next, we will check to see that the commands took effect for the 2 disks.
———————————————————————————————-
~ # esxcli storage nmp satp rule list | grep enable_ssd
VMW_SATP_ALUA_CX naa.60060160a89128005a6304b3d121e111 enable_ssd user
VMW_SATP_LOCAL naa.600508e0000000002edc6d0e4e3bae0e enable_ssd user
———————————————————————————————-
Then, we will run storage reclaim commands on those 2 disks. Make sure to specify your own NAA number when typing the commands.
———————————————————————————————-
~ # esxcli storage core claiming reclaim -d naa.60060160a89128005a6304b3d121e111
~ # esxcli storage core claiming reclaim -d naa.600508e0000000002edc6d0e4e3bae0e
Unable to unclaim path vmhba0:C1:T0:L0 on device naa.600508e0000000002edc6d0e4e3bae0e. Some paths may be left in an unclaimed state. You will need to claim them manually using the appropriate commands or wait for periodic path claiming to reclaim them automatically.
———————————————————————————————-
If you get the error message above, that’s OK. It takes time for the reclaim command to work.
You can check in the CLI by running the command below and looking for “Is SSD: false”
———————————————————————————————-
~ # esxcli storage core device list –device=naa.600508e0000000002edc6d0e4e3bae0e
naa.600508e0000000002edc6d0e4e3bae0e
Display Name: Dell Serial Attached SCSI Disk (naa.600508e0000000002edc6d0e4e3bae0e)
Has Settable Display Name: true
Size: 94848
Device Type: Direct-Access
Multipath Plugin: NMP
Devfs Path: /vmfs/devices/disks/naa.600508e0000000002edc6d0e4e3bae0e
Vendor: Dell
Model: Virtual Disk
Revision: 1028
SCSI Level: 6
Is Pseudo: false
Status: degraded
Is RDM Capable: true
Is Local: false
Is Removable: false
Is SSD: false
Is Offline: false
Is Perennially Reserved: false
Thin Provisioning Status: unknown
Attached Filters:
VAAI Status: unknown
Other UIDs: vml.0200000000600508e0000000002edc6d0e4e3bae0e566972747561
———————————————————————————————-
Check in the vSphere Client GUI. Rescan storage.
If it still does NOT say SSD, reboot the ESXi host.
Then look in the GUI and rerun the command below.
———————————————————————————————-
~ # esxcli storage core device list —device=naa.60060160a89128005a6304b3d121e111
naa.60060160a89128005a6304b3d121e111
Display Name: DGC Fibre Channel Disk (naa.60060160a89128005a6304b3d121e111)
Has Settable Display Name: true
Size: 435200
Device Type: Direct-Access
Multipath Plugin: NMP
Devfs Path: /vmfs/devices/disks/naa.60060160a89128005a6304b3d121e111
Vendor: DGC
Model: VRAID
Revision: 0430
SCSI Level: 4
Is Pseudo: false
Status: on
Is RDM Capable: true
Is Local: false
Is Removable: false
Is SSD: true
Is Offline: false
Is Perennially Reserved: false
Thin Provisioning Status: yes
Attached Filters: VAAI_FILTER
VAAI Status: supported
Other UIDs: vml.020000000060060160a89128005a6304b3d121e111565241494420
———————————————————————————————-
If it still does NOT say SSD, you need to wait. Eventually, the command works and displays as SSD in CLI and the GUI.
More Information:
See the article below:
Collateral for my presentation at the Workshop of the Association of Environmental Authorities of NJ (AEANJ)
I was glad for a chance to present at the Workshop of the Association of Environmental Authorities of NJ (AEANJ). There were great questions from the audience.
Thank you to attendees, Leon McBride for the invitation, Peggy Gallos, Karen Burris, and to my colleague Lucy Valle for videotaping.
My presentation is called “Data Portability, Data Security, and Data Availability in Cloud Services”
Here are the collateral files for the session:
Slides:
AEANJ Workshop 2016-slides-YuryMagalif
Video:
Collateral for my presentation at the NJ CTO Study Council
This was my first time presenting at the new NJ CTO Study Council event, and it was a wonderful experience. We did a Virtual Desktop demo which worked flawlessly.
Thank you to attendees and my speaking partners Dr. Richard O’Malley, Ralph Barca, Stan Bednarz, Dan Riordan, and to my colleagues Jeff Jackson and Ian Erikson for help with the presentation.
My presentation is called “Virtualization Roadmap through K-12”
Here are the collateral files for the session:
Slides:
NJ CTO Study Council – VIRTUALIZATION – ROADMAP THROUGH K12 – November 2014
My tips published in VMware “vSphere Design Pocketbook” 2nd edition
 For the 2nd year in a row, Frank Denneman and PernixData published me in “vSphere Design Pocketbook – 2.0.”
The book has “no fluff” guidance on building VMware vSphere.
Get a free copy here:
http://info.pernixdata.com/vsphere-pocketbook-2.0?MS=T
Those at VMworld 2014 can get a printed copy in PernixData booth #1017.
Thank you to the panel: Frank Denneman, Duncan Epping, Brad Hedlund, Cormac Hogan, William Lam, Michael Webster, and Josh Odgers, who picked my contribution. Here is how the process transpired:
http://frankdenneman.nl/2014/08/07/pre-order-vsphere-pocketbook-blog-edition/
I don’t yet know which one of my entries was published. Once the book is released at VMworld, I will update.
Unfortunately, this year I cannot make it to VMworld 2014, but I hope my friends will bring me a printed copy.
Slides from my session at the BriForum 2014 conference
 Thank you to those who attended my session at BriForum 2014 in Boston and filled out the survey!
This is my 2nd year speaking. I hope to be back next year.
Here is the session presentation slide deck:
AgentlessAntivirusTips&Tricks_YuryMagalif_July2014_BriForum_v3
Here is the link to the session description on the BriForum website:
http://briforum.com/US/sessions.html#tipstricks
This year, the conference in Boston was excellent. I got a chance to meet Brian Madden (pictured at left), Gabe Knuth, Jack Madden and the TechTarget crew. In addition, I met many amazing people who are the top experts in End-User Computing –Benny Tritsch, Shawn Bass, ProjectVRC team: Jeroen van de Kamp, Ryan Bijkerk & Ruben Spruijt.
In particular, Benny and Shawn’s HTML5 comparison session and ProjectVRC comparative testing session were the highlights of the conference for me.
In my own session, I was successful with a demo of McAfee and had a good number of questions from the audience. Stay tuned for the video, coming in August of 2014.
My presentation is called “Tips and Tricks on Building Agentless Antivirus Scanners for VMware View Virtual Desktops”
This tips and techniques session is best for administrators and consultants looking to implement an Antivirus solution for their VMware Virtual Desktop Infrastructure (VDI). The goal is to minimize I/O impact to VDI. We will discuss the two most developed scanners taking advantage of VMware vShield Endpoint application programing interfaces (APIs), Trend Micro Deep Security Antivirus 9.0 and McAfee Agentless MOVE AntiVirus 3.0. New this year is the discussion of VM-based scan policies. Overall, we will focus on real-world examples of VMware, Trend Micro and McAfee best practices. For example, the participants will learn whether to use their current Antivirus for VDI versus VDI agentless antivirus, why the VM Communication Interface (VMCI) driver is important, how to deploy the Security Virtual Appliances (SVAs), why you should disable VMotion for SVAs, how to test your solution using EICAR test files and how to shut down your VDI agentless antivirus VMs properly if doing maintenance. A basic understanding of VMware vSphere, VMware View and Enterprise Antivirus solutions is recommended.
Attendees will learn:
• How to minimize AntiVirus scanning I/O impact to VDI
• Whether to use your current AntiVirus versus VDI agentless Antivirus
• How to pick the best AntiVirus vendor for your environment
• How to test your agentless AntiVirus for effectiveness using EICAR files
• How to deploy and maintain your Trend Micro or McAfee infrastructure
Please send me any remaining questions that come up.
Collateral for my session at the HP Discover 2014 conference
Thank you to the 260 people who attended my session and filled out the survey!
I am very grateful that you keep coming to hear what I have to say and hope to be back next year.
My presentation is called “TB3306 – Tips and tricks on building VMware vSphere 5.5 with BladeSystem, Virtual Connect, and HP 3PAR StoreServ storage”
Returning for the sixth year in a row, this tips-and-techniques session is for administrators and consultants who want to implement VMware ESXi 5.5 (vSphere) on HP c-Class BladeSystem, Virtual Connect, and HP 3PAR StoreServ storage. New topics will include the auto-deployment of domain configurations and Single Root I/O Virtualization (SR-IOV) for bypassing vSwitches. The session will focus on real-world examples of VMware and HP best practices. For example, you will learn how to load-balance SAN paths; make Virtual Connect really “connect” to Cisco IP switches in a true active/active fashion; configure VLANs for the Virtual Connect modules and virtual switches; solve firmware and driver problems. In addition, you will receive tips on how to make sound design decisions for iSCSI vs. Fibre Channel, and boot from SAN vs. local boot. To get the most from this session, we recommend attendees have a basic understanding of VMware ESX, HP c-Class BladeSystem, and Virtual Connect.
Here are the collateral files for the session:
Slides:
Use #HPtrick hashtag to chat with me on Twitter:
June 16, 2014 — Monday, 2-3 pm Eastern Standard Time (11 am – 12 pm Pacific Standard Time).
