Category: ESXi
Assessing your Infrastructure for VDI with real data – Part 2 of 2 – Analysis
For VSI, we established that using analysis tools was a necessity, and VMware originally provided wonderful Capacity Planner tool. However, it soon became evident that for VDI, it is even more important to use analysis tools. That is because for VDI, when you buy hardware and software, the investment is generally higher. You need a lot more, faster storage. You need many servers and a fast network. So the margin of error is smaller.
Consequently, using Liquidware FIT or ControlUp is essential. There are now many tools on the market, like Lakeside Systrack or Nexthink.
So how do you analyze your physical desktops for VDI?
First, buy a license for the Liquidware FIT tool (per user, inexpensive), or buy an engagement from your friendly Valued Added Reseller or Integrator who is a Liquidware partner. If you buy a service from a partner, then usually up to 250 desktop license will be included with the service.
Here, I will talk about services of the partner because that is what I do. However, if you are doing this yourself, just apply the same steps.
You will need to provide your partner’s engineer with space for 2 small Liquidware virtual appliances. The only gotcha is that you want them on the fastest storage you have (SSD preferable). That is because on slower storage, it takes much longer to process any analysis or reports.
The engineer will come and install the 2 appliances into your vSphere. Then, the engineer will give you an EXE or MSI with an agent. Usually, you can use the same mechanism you already use to install software on your desktops to distribute the agent. For example, distribution tools like Microsoft SCCM, Symantec Altiris, LANDesk, and even Microsoft Group Policy will all be good. If you don’t have a mechanism for software distribution, then your engineer can use a script to install the agents on all PCs.
Make sure to choose a subset of your PCs, and at least some from each possible group of similar users (Accounting, Sales, IT, etc.). Your sample size could be about 10-25% of total user count. Obviously, the higher the analysis percentage, the more accuracy you get. But the goal here is not 100% accuracy – it’s impossible to achieve 100%. Assessment and performance analysis is an art as much as a science. Thus, you need just enough users to get a ballpark estimate of what hardware you need to buy. Also, run the assessment for 1 month preferably, or at a bare minimum 2 weeks. The time of the start of the data collection above should start from the time you deploy your last user with the Liquidware agent.
Your partner engineer will need remote access, if possible, to check on the progress of the installation. First, the engineer will check if the agents are reporting successfully back to the Liquidware appliances. During the month, the engineer will make sure agents are reporting and data can be extracted from the appliance.
In the middle of the assessment, engineer will do a so-called “normalization” of the data. That is to make sure the results are compatible with rules of thumb for analysis. If necessary, the engineer will readjust thresholds and recalculate the data back to the beginning.
At the end of 30 days, the engineer will generate a machine-made report on the overall performance metrics, and will present the report to you.
At some partners, for an extra service price, the engineer will go further, and will analyze the report for the amount and performance parameters of hardware you need. In addition, the engineer will create a written report and present all the data to you.
In either case, you will know which desktops have the best score for virtualization, and which ones you should not virtualize. If you go with more advanced report services from your partner, then you will also understand how to map the results to hardware and further insights.
One way of mitigating bad VDI sizings is to also use a load simulation tool like LoginVSI. However, LoginVSI is only useful for clients who can afford to buy similar equipment for the lab that they will buy for production. Using LoginVSI, you can test robotic (fake) users doing tasks that normal users will do in VDI. LoginVSI allows you to have a ballpark hardware number that is good. However, the LoginVSI number does not have real user experience data. For that, you need tools like Liquidware FIT and associated work to determine proper VDI strategy.
Understanding what your current user experience is, and also how that experience could be accommodated with virtual desktops is essential to VDI. You should do this assessment before buying your hardware. Doing an assessment ensures that your users get the same experience or better on the virtual desktop as they have on the physical desktop (the holy grail of VDI).
Renaming Virtual Disks (VMDK) in VMware ESXi
Symptom:
You have just cloned a VM, and would like to rename your VMDKs to match the new name of the clone.
When you try to rename a VMDK in the GUI Datastore Browser in vSphere client, you get a message:
“At the moment, vSphere Client does not support the renaming of virtual disks”
How do you go around the message?
Instructions:
- Lookup the name of your Datastore and your VM in the GUI.
- Start SSH service.
- Login as root to your ESXi host.
- In a SSH session type the following commands. Substitute the name of your Datastore for STORAGENAME and your VM for VMNAME.
- cd /vmfs/volumes/STORAGENAME/VMNAME
- Substitute the name of your old VMDK for OLDNAME and your new VMDK for NEWNAME. Remember – everything is case sensitive.
- vmkfstools -E ./OLDNAME.vmdk ./NEWNAME.vmdk
The lure of Hyper-Converged for VDI
So you decided to implement Virtual Desktop Infrastructure (VDI). Virtual desktops and app delivery sound sexy, but once you’ve started delving into the nitty gritty, you quickly realize that VDI has many variables. In fact, so many, that you start to feel overwhelmed.
At this point you have a couple of options. First, you can keep doing this yourself, but that will take valuable time. You can hire a VDI engineer to your team, but that also tales time and money to find a great engineer.
Another option is to hire a Value Added Reseller that has done VDI a hundred times. Great idea – I will love you forever, and will do great VDI for you. But I can be expensive.
One particular sticking point in VDI is the sizing of the hardware for the environment. If you undershoot the amount of compute, storage, memory or networking, you risk having unhappy users with underpowered virtual desktops. If you overshoot, you may be chastised for overspending.
Too often I have seen the user profile not properly examined, sized etc. The result is that the derived virtual desktop is low on memory or CPU. The user immediately blames the new technology, not even assigning blame to something they may have done. But the real performance problem culprit may lie somewhere else. However, the user just had his shiny physical machine taken away, and it was replaced with something intangible. Of course, all the problems, whether related to VDI or not, will be blamed on VDI, and possibly the VDI sizing. The bad buzz spreads through the company. Such buzz kills your VDI project faster than performance problems.
So, what is one way to avoid thinking about sizing? Hyper-Converged.
Hyper-Converged means a node in a cluster has a little bit of everything – compute, storage, memory, network. Each node is generally the same but there could be different types of nodes – for example, Simplivity has some nodes with everything, and some nodes only doing compute.
Since most nodes are the same, once you figured out how many average Virtual Desktops in a specific profile fit on a node, you can just keep adding nodes for scalability.
In fact, Nutanix capitalized on that brilliantly when they announced the famous guarantee – once the customer says how many users they want to put on Nutanix, the vendor will provide enough Hyper-Converged nodes to have a great user experience. The guarantee was hard to enforce on both the customer end and Nutanix end. But the guarantee sure had lots of marketing power. Time and time again I heard it from customers and other VARs. The guarantee was a placebo for making VDI easier.
Consequently, you should not just rely on a guarantee for VDI sizing. Sizing should be verified with load simulation tools like LoginVSI and View Planner. Then, the profile of your actual user should be evaluated by collecting user experience data with a tool like Liquidware FIT or Lakeside SysTrack.
Once the data is collected and analyzed, you can decide what number of Hyper-Converged nodes to buy. Hyper-Converged makes the sizing easy because you always deal with uniform nodes.
Once you are in production, you should be monitoring user experience constantly with a tool like Liquidware UX. UX will allow you to always have a solid idea of what your user profiles to. As a result, you can confidently say, “On my Hyper-Converged node I can host up to 50 users.” Thus, if you grow to 100 users, you need 2 Hyper-Converged nodes.
Saying the above is the holy grail of scalability. And therein lies the lure of Hyper-Converged – as a basic VDI building block. That is why Hyper-Converged companies started with strong VDI stories, and only later began marketing for Virtual Server Infrastructure.
And any technology that makes VDI easier, even by one iota, makes VDI more popular. Hail Hyper-Converged for VDI!
Assessing your Infrastructure for VDI with real data – Part 1 of 2 – History
It is now a common rule of thumb that when you are building Virtual Server Infrastructure (VSI), you must assess your physical environment with analysis tools. The analysis tools show you how to fit your physical workloads onto virtual machines and hosts.
The golden standard in analysis tools is VMware’s Capacity Planner. Capacity Planner used to be made by a company called AOG. AOG was analyzing not just for physical to virtual migrations, but was doing overall performance analysis of different aspects of the system. AOG was one of the first agentless data collections tools. Agentless was better because you did not have to touch each system in a drastic way, there was less chance of drivers going bad or performance impact to the target system.
Thus, AOG partnered with HP and other manufacturers, and was doing free assessments for their customers, while getting paid by the manufacturer on the backend. AOG tried to sell itself to HP, but HP, stupidly, did not buy AOG. Suddenly, VMware came from nowhere and snapped up AOG. VMware at the time needed an analysis tool to help customers migrate to the virtual infrastructure faster.
When VMware bought AOG, VMware dropped AOG’s other analysis business, and made AOG a free tool for partners to analyze migrations to the virtual infrastructure. It was a shame, because AOG’s tool, renamed to Capacity Planner, was really good. Capacity Planner relies solely on Windows Management Instrumentation (WMI) functions that is already built into Windows and is collecting information all the time. Normally, WMI discards information like performance, unless it is collected somewhere by choice. Capacity Planner just enabled that choice, and collected WMI performance and configuration data from each physical machine.
When VMware entered the Virtual Desktop Infrastructure (VDI) business with Horizon View, it lacked major pieces in the VDI ecosphere. One of the pieces was profile management, another piece was planning and analysis, another piece was monitoring. Immediately, numerous companies sprang to life to help VMware fill the need. Liquidware Labs (where the founder worked for VMware) was the first to come up with a robust planning and analysis tool in Stratusphere FIT, then with monitoring tool in Stratusphere UX. Lakeside SysTrack came on the scene. VMware used both internally, although the preference was for Liquidware.
Finally, VMware realized that the lack of analysis tool for VDI, made by VMware, was hindering them. But what they failed to realize, was that such tool already existed at VMware for years – Capacity Planner. The Capacity Planner team was neglected, so rarely would any updates were done to the tool. However, since Capacity Planner could already analyze physical machines for performance, it was easy to modify the code to collect information on virtualizing physical desktops, in addition to servers.
Capacity Planner code was eventually updated with desktops analysis. All VMware partners were jumping with joy – we now had a great tool and we did not have to relearn any new software. I remember that I eagerly collected my first data, and began to analyze the data. After analysis, the tool told me I needed something like twenty physical servers to hold 400 virtual desktops. Twenty desktops per server? That sounded wasteful. I was a beginner VDI specialist then, so I trusted the tool but still had doubts. Then I did a few more passes at the analysis, and kept getting wildly different numbers. Trusting my gut instinct, I decided to redo one analysis with Liquidware FIT.
Of course, Liquidware FIT has agents, so I used it, but always thought that it would be nice not to have agents. So VMware’s addition of desktop analysis to agentless Capacity Planner was very welcome. So, back to my analysis, after running Liquidware FIT, I came up with completely different numbers. I don’t remember what they were – perhaps 60 desktops per physical server, or something else. But what I do remember was that Liquidware’s analysis made sense, where Capacity Planner did not. My suspicions about Capacity Planner as a tool were confirmed by VMware’s own VDI staff, who, when asked if they use Capacity Planner to size VDI said, “For VDI, avoid Cap Planner like the plague, and keep using Liquidware FIT.”
As a result, I kept using Liquidware FIT since then, and never looked back. While FIT does have agents, now I understand that getting metrics like Application load times and User Login delay is not possible without agents. That is because Windows does not include such metrics in WMI. Therefore, a rich agent is able to pick up many more user experience items, and thus do much better modeling.
Moving a VMware Horizon View virtual desktop between separate Horizon View environments
Requirements:
Sometimes you may build two distinct VMware Horizon View environments for separate business units, for Disaster Recovery, or for testing purposes.
In that case, a need may arise to move a virtual desktop between the independent Horizon View infrastructures.
Assumptions:
There are many ways Horizon View may be configured. However, this article assumes the following settings in both environments:
- Manual, non-automated, dedicated pools for virtual desktops
- Full clone virtual desktops
- All user data is contained inside the virtual desktop, most likely on drive C
- All virtual desktop disks (vmdks, C and others) are contained within the same VM directory on the storage
- Storage is presented to ESXi through the NFSv3 protocol
- Microsoft Active Directory domain is the same across both sites
- VLANs/subnets the same or different between the two sites
- DHCP is configured for the desktop VM in both sites
- Virtual desktop has Windows 7 or Windows 10 operating system
- Connection Servers do not replicate between environments
- No Cloud Pod federation
- Horizon View v7.4
- vCenter VCSA 6.5 Update 1e
- ESXi 6.5 for some hosts and 6.0 Update 3 for other hosts
There are other ways to move a virtual desktop when the Horizon View is setup with automation and Linked Clones, but they are subject for a future article.
The first Horizon View infrastructure will be called “Source” in this article. The second Horizon View infrastructure, where the virtual desktop needs to be moved, will be called “Destination” in this article.
Instructions:
- Record which virtual desktop names are assigned to which Active Directory users on the Source side. You can do that by Exporting a CSV file from the Pool’s Inventory tab.
- If the Source Horizon View infrastructure is still available (not destroyed due to a disaster event), then continue with the following steps on the Source environment. If the Source Horizon View infrastructure has been destroyed due to a disaster, go to Step 9.
- Power off the virtual desktop. Ensure that in Horizon View Manager you don’t have a policy on your pool to keep powering the virtual desktop on.
- In Horizon View Manager, click on the pool name, select the Inventory tab.
- Right click the desktop name and select Remove.
- Choose “Remove VMs from View Manager only.”
- In vSphere Web Client, right click the desktop VM and select “Remove from Inventory.”
- Unmount the NFSv3 datastore that contains the virtual desktop from Source ESXi hosts.
- At this point how the datastore gets from Source to the Destination will vary based on your conditions.
- For example, for testing purposes, the NFSv3 datastore can be mounted on the Destination hosts.
- In case of disaster, there could be storage array technologies in place that replicate the datastore to the Destination side. If the Source storage array is destroyed, go to the Destination storage array and press the Failover button. Failover will usually make the Destination datastore copy Read/Write.
- Add the NFSv3 datastore that contains the virtual desktop to the Destination ESXi hosts, by going through the “New Datastore” wizard in vSphere Web Client.
- Browse the datastore File structure. Go to the directory of the virtual desktop’s VM, find the .vmx file.
- Right click on the .vmx file and select “Register VM…”
- Leave the same name for the desktop VM as offered by the wizard.
- Put the desktop VM in the correct VM folder and cluster/resource pool, that is visible by the Destination’s Horizon View infrastructure.
- Edit the desktop VM’s settings and select the new Port Group that exists on the Destination side (if required).
- Power on the desktop VM from the vSphere Web Client.
- You might get the “This virtual machine might have been moved or copied.” question.
- When vSphere sees that the storage path of the VM does not match what was originally in the .vmx file, you might get this question.
- Answering “Moved” keeps the UUID of the virtual machine, and therefore the MAC address of the network adapter and a few other things.
- Answering “Copied” changes the UUID of the virtual machine, and therefore the MAC address of the network adapter and a few other things.
- In the majority of cases (testing, disaster recovery), you will be moving the desktop virtual machine from one environment to another. Therefore, answer “I Moved It,” to keep the UUID and thus the MAC address the same.
- Wait until the desktop virtual machine obtains the IP address from the Destination’s DHCP server, and registers itself with the DNS server and Active Directory.
- Remember, we are assuming the same Active Directory domain across both sites. As a result, the desktop VM’s AD computer name and object will remain the same.
- Monitor the IP address and DNS assignment from the vSphere Web Client’s Summary tab for the desktop VM.
- In Destination’s Horizon View Manager, click on the Manual, Full Clone, Non-automated, Dedicated pool that you have created already.
- If you did not create the pool yet, create a new pool and put any available VM at the Destination in the pool. The VM that you put will just be a placeholder to create the pool. Once the pool is created, you can remove the placeholder VM and only keep your moved virtual desktops.
- Go to the Entitlements tab and add any user group or users to be entitled to get desktops from the pool. Most likely, it will the the same user group or user that was entitled to the pool on the Source side.
- Select the Inventory tab and click the Add button.
- Add the desktop VM that you just moved.
- Check the status of the desktop VM. First, the status will say “Waiting for agent,” then “In progress,” then “Available.”
- Right click on the desktop VM and select Assign User.
- Select the correct Active Directory user for the desktop.
- As the user to login to the virtual desktop using Horizon View Client or login on behalf of the user.
- For the first login after the move, the user may be asked by Windows to “Restart Now” or “Restart Later.” Please direct the user to “Restart Now.”
- After the restart, the user may utilize the Horizon View Client to login to the Destination’s moved desktop normally.
What’s next for Virtual Desktop Infrastructure?
Greetings CIOs, IT Managers, VM-ers, Cisco-ites, Microsoftians, and all other End-Users out there… Yury here. Yury Magalif. Inviting you now to take another virtual trip with me to the cloud, or at least to your data center. As Practice Manager at CDI, your company is depending on my team of seven (plus or minus a consultant or two) to manage the implementation of virtualized computing including hardware, software, equipment, service optimization, monitoring, provisioning, etc. And you thought we were sitting behind the helpdesk and concerned only with front-end connectivity. Haha (still laughing) that’s a good one!
VDI: OUR JOURNEY BEGINS HERE
Allow me to paint a simple picture and add a splash of math to illustrate why your CIO expects so much from me and my team. Your company posted double-digit revenue growth for three years running and somehow, now, in Q2 of year four, finds itself in a long fourth down and 20 situation. (What? You don’t understand American football analogies? Okay, in the international language of auto-racing, we are 20 laps behind and just lost a wheel.) One thousand employees need new laptops, docking stations, flat panel displays, and related hardware. Complicating the matter are annual software licensing fees for a group of 200 but with only five simultaneous concurrent users worldwide. At $1,500 per user times 1,000, plus the $100 fee, your CIO has to decide how it will explain to the board that it plans to spend another 1.5 million dollars on IT just after Q1 closed down 40 percent and Q2 is looking to be even worse.
To read the rest of this blog, where I try something different, please go to my work blog page:
http://www.cdillc.com/whats-next-virtual-desktop-infrastructure/

How to use Adobe Flash Player after its End of Life — absolutely free
***NOW UPDATED with Apple MacOS instructions, in addition to Microsoft Windows***
***Also updated with the solution to the mms.cfg file not working due to the UTF-8 bug***
You may have seen plenty of announcements over the past few years about Adobe Flash coming to the end of life. Various browser manufacturers announced they will disable Flash. Microsoft announced they will uninstall Flash from Windows using a Windows Update (although only the Flash that came automatically with Windows, NOT user-installed Flash). Apple completely disabled Flash in Safari. Below is the dreaded Flash End of Life logo that you will see once Flash is finally turned off:

Yes, I agree with Steve Jobs — Flash is buggy and not secure. However, there are many IT manufacturers out there that used Flash to build their management software interfaces. Some common examples are VMware vSphere, Horizon, and HPE CommandView. That management software is not going away, even though most of it is older. In fact, some of these Flash-managed devices will be there for the next 10 years. So, what can the desperate IT administrator do to manage his or her devices?
Adobe sends users for extended Flash support to a company called Harman. HPE charges money for older CommandView support. Do not pay any money to these companies to use Flash.
Preparation
I am not recommending Chrome or Edge browsers for the below solution because they will auto-update and newer versions will not support Flash at all. Further, turning off auto-update in Chrome and Edge is difficult.
Here are 3 methods to get Flash running on your favorite website. Windows methods assume 64-bit Operating systems. If you want to try 32-bit Windows, the files are available, but the functionality has not been tested (although it will probably work). All the files talked about in these methods are downloadable below:
firefox-flash-end-solution-versions.zip_.pdf — Right click on the link and choose “Save Link As” or “Download Linked File As”. Save the file to your computer. Unhide file extensions. Remove _.pdf from the end of the name and Unzip/ExtractAll the file.
The file contains:
policies.json
Firefox Setup 78.6.0esr-64bit.exe
Firefox Setup 78.6.0esr-32bit.exe
Firefox 78.6.0esr.dmg
flash-eol-versions.zip_-1.pdf — Right click on the link and choose “Save Link As” or “Download Linked File As”. Save the file to your computer. Unhide file extensions. Remove _-1.pdf from the end of the name and Unzip/ExtractAll the file.
The file contains:
mms.cfg
Flash player for Firefox and Win7 – use this for Solution: install_flash_player.exe
Flash for Safari and Firefox – Mac: install_flash_player_osx.dmg
Flash for Opera and Chromium – Mac: install_flash_player_osx_ppapi.dmg
Flash Player for Chromium and Opera browsers: install_flash_player_ppapi.exe
Flash Player for IE active x: install_flash_player_ax.exe
Flash Player Beta 32 bit – May 14-2020: flashplayer_32_sa.exe flashplayer_32_sa.dmg
flash_player_32_0_admin_guide.pdf
Method 1 — Microsoft Windows, if you have Internet Explorer browser and Flash already installed
This method applies to many older Windows Operating systems like Server 2008, 2012, 2016 and Windows 7 and even older Windows 10. It assumes a 64-bit operating system.
- Do NOT upgrade Internet Explorer to the Microsoft Edge browser.
- Set Internet Explorer to be the default browser in Default Programs.
- Download the mms.cfg file.
- Open the mms.cfg file with Notepad.
- Edit the URL on the right of the Equals sign with an address of the Flash website or file that you need.
- Ex. AllowListUrlPattern=https://localhost/admin/
- If you need additional websites, place them on the next lines, like in this example.
- AllowListUrlPattern=https://localhost/admin/
- AllowListUrlPattern=http://testwebsite.com/
- AllowListUrlPattern=*://*.finallystopflash.com/

- Save mms.cfg file on the desktop.
- Important: if you did not use my file, but you are creating the file yourself, makes sure in Notepad Save As dialog, you select “All Files” as the type, and “UTF-8” as the Encoding.
- Copy the mms.cfg file into the following directory: C:\Windows\SysWOW64\Macromed\Flash\
- That disables Flash updates and allows to use Flash on specified websites.
- If you don’t see this directory, it means Flash is not installed and you need to use Method 2 instead.
- Restart the Internet Explorer browser.
- Go to your website.
- This will open Internet Explorer with Flash functional.
Method 2 — Microsoft Windows, if you don’t have Internet Explorer and/or Flash installed
This method applies to almost any Windows machine. It assumes a 64-bit operating system.
- If you already have another version of Firefox installed, uninstall it.
- Download the “Firefox Setup 78.6.0esr-64bit.exe” and “policies.json” files. This Firefox installer is the Enterprise version (what you need).
- Install Firefox ESR, but do NOT open it, or if it opens, close right away.
- In the “C:\Program Files\Mozilla Firefox\” directory, create a folder called “distribution”
- Put “policies.json” file into the folder “distribution” — this disables automatic Firefox updates.
- Start Firefox ESR.
- Go to URL: about:policies
- Check that “DisableAppUpdate” policy is there and it says “True”.
- Set Firefox to be the default browser in Default Programs.
- Download “Flash player for Firefox and Win7 – use this for Solution: install_flash_player.exe” and “mms.cfg”.
- Double click on the install_flash_player.exe to install Flash for Firefox. Click all Next prompts.
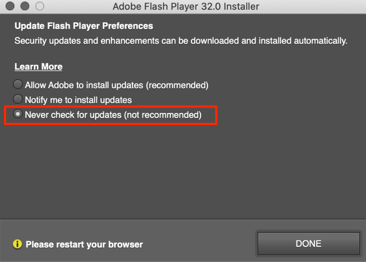
- If you are prompted to choose “Update Flash Player Preferences”, select “Never Check for Updates”.
- Open mms.cfg file with Notepad
- Edit the URL on the right of the Equals sign with an address of the Flash website or file that you need.
- Ex. AllowListUrlPattern=https://localhost/admin/
- If you need additional websites, place them on the next lines, like in these examples:
- AllowListUrlPattern=https://localhost/admin/
- AllowListUrlPattern=http://testwebsite.com/
- AllowListUrlPattern=*://*.finallystopflash.com/
- Save mms.cfg file on the desktop.
- Important: if you did not use my file, but you are creating the file yourself, makes sure in Notepad Save As dialog, you select “All Files” as the type, and “UTF-8” as the Encoding.
- Copy the “mms.cfg” file into the following directory: C:\Windows\SysWOW64\Macromed\Flash\
- That disables Flash updates and allows to use Flash on specified websites.
- Restart Firefox ESR.
- When going to the flash website you specified, click on the big logo in the middle, then “Allow”.
Method 3 — Apple MacOS
This method applies to almost any MacOS version.
- If you already have another version of Firefox installed, uninstall it.
- Download “Firefox 78.6.0esr.dmg” and “policies.json” files. This Firefox ESR for Mac installer is the Enterprise version (what you need).
- Open the DMG file. Drag the Firefox ESR icon to the Applications folder, which installs it on the Mac. Do NOT open Firefox ESR yet.
- Open the Terminal application.
- Type the following and press Enter (start typing from xattr).
- xattr -r -d com.apple.quarantine /Applications/Firefox.app
- This allows Firefox customization without corrupting the application.
- xattr -r -d com.apple.quarantine /Applications/Firefox.app

- Go to the Applications folder.
- Right click on the Firefox.app application and select “Show Package Contents”.
- Go to Contents>Resources folder and when there create a folder called “distribution”.
- Put “policies.json” file into the folder “distribution” — this disables automatic Firefox updates.

- Start Firefox ESR.
- Go to URL: about:policies
- Check that “DisableAppUpdate” policy is there and it says “True”.
- Download “Flash for Safari and Firefox – Mac: install_flash_player_osx.dmg” and “mms.cfg”.
- Double click on the install_flash_player_osx.dmg to mount the disk. Double click the installer to install Flash for Firefox.
- When asked to choose on “Update Flash Player Preferences”, select “Never Check for Updates (not recommended)”.
- Place the mms.cfg file on the Desktop. Open mms.cfg file with TextEdit.
- Edit the URL on the right of the Equals sign with an address of the Flash website or file that you need.
- Ex. AllowListUrlPattern=https://localhost/admin/
- If you need additional websites, place them on the next lines, like in these examples:
- AllowListUrlPattern=https://localhost/admin/
- AllowListUrlPattern=http://testwebsite.com/
- AllowListUrlPattern=*://*.finallystopflash.com/

- Save mms.cfg file to the Desktop. Copy the mms.cfg file.
- Paste the “mms.cfg” file into the following directory:
- /Library/Application Support/Macromedia/ (Mac Hard Drive>Library>Application Support>Macromedia)
- If there is already an existing mms.cfg file in there, Replace it.
- That disables Flash updates and allows to use Flash on specified websites.

- Restart Firefox ESR for Mac.
- When going to the flash website you specified, click on the big logo in the middle, then “Allow”.
References
https://support.mozilla.org/en-US/questions/1283061
https://community.adobe.com/t5/flash-player/adobe-flash-availability-after-2020/td-p/10929047?page=1
https://support.mozilla.org/en-US/kb/deploying-firefox-customizations-macos
Collateral for my presentation at the New Jersey VMware User Group (NJ VMUG)
I was delighted at the chance to present at the New Jersey VMware User Group (NJ VMUG). The attendees posed excellent questions.
Thank you much to Ben Liebowitz for the invitation.
My presentation is called “Virtual Desktop (VDI) Performance Troubleshooting”
Here are the slides for the session:
Virtual Desktops (VDI) on an Airplane
Recently, while flying on United Airlines I noticed the WiFi sign on the seat in front. I never used WiFi on planes before, so I thought it would be expensive. Imagine my surprise when it was cheap. It was probably cheap to compensate the absence of TV displays.
I immediately thought of our CDI Virtual Desktop (VDI) lab in Teterboro, NJ (USA). Would the Virtual Desktop even be usable? How will video run? I connected immediately, started recording my screen and opened my Virtual Desktop. It worked! Everything except video worked well.
My idea came because of Michael Webster, who has already tried doing this and wrote about it. I also wanted to do it in the Gunnar Berger style of protocol comparison. So, for your viewing pleasure — Virtual Desktops (VDI) on an Airplane.
——
Description:
This video is a demonstration of the Virtual Desktop (VDI) technology, located at CDI in Teterboro, NJ (USA) being accessed from an airplane 34,000 feet (10 km) high. Virtual Desktops allow you to use your Windows desktop from anywhere — even on satellite based WiFi. You will see PCoIP and HTML5 tests, Microsoft Word, HD video, YouTube video and vSphere client utilization.
Demonstration: Yury Magalif.
Lab Build: Chris Ruotolo.
Connecting From: Random clouds above Missouri, USA
Equipment and Software used:
VMware View
VMware vSphere
Cisco C-series servers.
EMC XtremIO all flash storage array.
10Zig Apex 2800 PCoIP acceleration card with a Teradici chip.
Inspired by:
Michael Webster’s blog article:
The VMware View from the Horizon at 38,000 Feet and 8000 Miles Away
Gunnar Berger’s low-latency VDI comparison video:
VMware vSphere misidentifies local or SAN-attached SSD drives as non-SSD
Symptom:
You are trying to configure Host Cache Configuration feature in VMware vSphere. The Host Cache feature will swap memory to a local SSD drive, if vSphere encounters memory constraints. It is similar to the famous Windows ReadyBoost.
Host Cache requires an SSD drive, and ESXi will detect the drive type as SSD. If the drive type is NOT SSD, Host Cache Configuration will not be allowed.
However, even though you put in some local SSD drives on the ESXi host, and also have an SSD drive on your storage array coming through, ESXi refuses to recognize the drives as SSD type, and thus refuses to let you use Host Cache.
Solution:
Apply some CLI commands to force ESXi into understanding that your drive is really SSD. Then reconfigure your Host Cache.
Instructions:
Look up the name of the disk and its naa.xxxxxx number in VMware GUI. In our example, we found that the disks that are not properly showing as SSD are:
- Dell Serial Attached SCSI Disk (naa.600508e0000000002edc6d0e4e3bae0e) — local SSD
- DGC Fibre Channel Disk (naa.60060160a89128005a6304b3d121e111) — SAN-attached SSD
Check in the GUI that both show up as non-SSD type.
SSH to ESXi host. Each ESXi host will require you to look up the unique disk names and perform the commands below separately, once per host.
Type the following commands, and find the NAA numbers of your disks.
In the examples below, the relevant information is highlighted in RED.
The commands you need to type are BOLD.
The comments on commands are in GREEN.
———————————————————————————————-
~ # esxcli storage nmp device list
naa.600508e0000000002edc6d0e4e3bae0e
Device Display Name: Dell Serial Attached SCSI Disk (naa.600508e0000000002edc6d0e4e3bae0e)
Storage Array Type: VMW_SATP_LOCAL
Storage Array Type Device Config: SATP VMW_SATP_LOCAL does not support device configuration.
Path Selection Policy: VMW_PSP_FIXED
Path Selection Policy Device Config: {preferred=vmhba0:C1:T0:L0;current=vmhba0:C1:T0:L0}
Path Selection Policy Device Custom Config:
Working Paths: vmhba0:C1:T0:L0
naa.60060160a89128005a6304b3d121e111
Device Display Name: DGC Fibre Channel Disk (naa.60060160a89128005a6304b3d121e111)
Storage Array Type: VMW_SATP_ALUA_CX
Storage Array Type Device Config: {navireg=on, ipfilter=on}{implicit_support=on;explicit_support=on; explicit_allow=on;alua_followover=on;{TPG_id=1,TPG_state=ANO}{TPG_id=2,TPG_state=AO}}
Path Selection Policy: VMW_PSP_RR
Path Selection Policy Device Config: {policy=rr,iops=1000,bytes=10485760,useANO=0;lastPathIndex=1: NumIOsPending=0,numBytesPending=0}
Path Selection Policy Device Custom Config:
Working Paths: vmhba2:C0:T1:L0
naa.60060160a891280066fa0275d221e111
Device Display Name: DGC Fibre Channel Disk (naa.60060160a891280066fa0275d221e111)
Storage Array Type: VMW_SATP_ALUA_CX
Storage Array Type Device Config: {navireg=on, ipfilter=on}{implicit_support=on;explicit_support=on; explicit_allow=on;alua_followover=on;{TPG_id=1,TPG_state=ANO}{TPG_id=2,TPG_state=AO}}
Path Selection Policy: VMW_PSP_RR
Path Selection Policy Device Config: {policy=rr,iops=1000,bytes=10485760,useANO=0;lastPathIndex=1: NumIOsPending=0,numBytesPending=0}
Path Selection Policy Device Custom Config:
Working Paths: vmhba2:C0:T1:L3
———————————————————————————————-
Note that the Storage Array Type is VMW_SATP_LOCAL for the local SSD drive and VMW_SATP_ALUA_CX for the SAN-attached SSD drive.
Now we will check to see if in CLI, ESXi reports the disks as SSD or non-SSD for both disks. Make sure to specify your own NAA number when typing the command.
———————————————————————————————-
~ # esxcli storage core device list –device=naa.600508e0000000002edc6d0e4e3bae0e
naa.600508e0000000002edc6d0e4e3bae0e
Display Name: Dell Serial Attached SCSI Disk (naa.600508e0000000002edc6d0e4e3bae0e)
Has Settable Display Name: true
Size: 94848
Device Type: Direct-Access
Multipath Plugin: NMP
Devfs Path: /vmfs/devices/disks/naa.600508e0000000002edc6d0e4e3bae0e
Vendor: Dell
Model: Virtual Disk
Revision: 1028
SCSI Level: 6
Is Pseudo: false
Status: degraded
Is RDM Capable: true
Is Local: false
Is Removable: false
Is SSD: false
Is Offline: false
Is Perennially Reserved: false
Thin Provisioning Status: unknown
Attached Filters:
VAAI Status: unknown
Other UIDs: vml.0200000000600508e0000000002edc6d0e4e3bae0e566972747561
~ # esxcli storage core device list –device=naa.60060160a89128005a6304b3d121e111
naa.60060160a89128005a6304b3d121e111
Display Name: DGC Fibre Channel Disk (naa.60060160a89128005a6304b3d121e111)
Has Settable Display Name: true
Size: 435200
Device Type: Direct-Access
Multipath Plugin: NMP
Devfs Path: /vmfs/devices/disks/naa.60060160a89128005a6304b3d121e111
Vendor: DGC
Model: VRAID
Revision: 0430
SCSI Level: 4
Is Pseudo: false
Status: on
Is RDM Capable: true
Is Local: false
Is Removable: false
Is SSD: false
Is Offline: false
Is Perennially Reserved: false
Thin Provisioning Status: yes
Attached Filters: VAAI_FILTER
VAAI Status: supported
Other UIDs: vml.020000000060060160a89128005a6304b3d121e111565241494420
———————————————————————————————-
Now we will add a rule to enable SSD on those 2 disks. Make sure to specify your own NAA number when typing the commands.
———————————————————————————————-
~ # esxcli storage nmp satp rule add –satp VMW_SATP_LOCAL –device naa.600508e0000000002edc6d0e4e3bae0e –option=enable_ssd
~ # esxcli storage nmp satp rule add –satp VMW_SATP_ALUA_CX –device naa.60060160a89128005a6304b3d121e111 –option=enable_ssd
———————————————————————————————-
Next, we will check to see that the commands took effect for the 2 disks.
———————————————————————————————-
~ # esxcli storage nmp satp rule list | grep enable_ssd
VMW_SATP_ALUA_CX naa.60060160a89128005a6304b3d121e111 enable_ssd user
VMW_SATP_LOCAL naa.600508e0000000002edc6d0e4e3bae0e enable_ssd user
———————————————————————————————-
Then, we will run storage reclaim commands on those 2 disks. Make sure to specify your own NAA number when typing the commands.
———————————————————————————————-
~ # esxcli storage core claiming reclaim -d naa.60060160a89128005a6304b3d121e111
~ # esxcli storage core claiming reclaim -d naa.600508e0000000002edc6d0e4e3bae0e
Unable to unclaim path vmhba0:C1:T0:L0 on device naa.600508e0000000002edc6d0e4e3bae0e. Some paths may be left in an unclaimed state. You will need to claim them manually using the appropriate commands or wait for periodic path claiming to reclaim them automatically.
———————————————————————————————-
If you get the error message above, that’s OK. It takes time for the reclaim command to work.
You can check in the CLI by running the command below and looking for “Is SSD: false”
———————————————————————————————-
~ # esxcli storage core device list –device=naa.600508e0000000002edc6d0e4e3bae0e
naa.600508e0000000002edc6d0e4e3bae0e
Display Name: Dell Serial Attached SCSI Disk (naa.600508e0000000002edc6d0e4e3bae0e)
Has Settable Display Name: true
Size: 94848
Device Type: Direct-Access
Multipath Plugin: NMP
Devfs Path: /vmfs/devices/disks/naa.600508e0000000002edc6d0e4e3bae0e
Vendor: Dell
Model: Virtual Disk
Revision: 1028
SCSI Level: 6
Is Pseudo: false
Status: degraded
Is RDM Capable: true
Is Local: false
Is Removable: false
Is SSD: false
Is Offline: false
Is Perennially Reserved: false
Thin Provisioning Status: unknown
Attached Filters:
VAAI Status: unknown
Other UIDs: vml.0200000000600508e0000000002edc6d0e4e3bae0e566972747561
———————————————————————————————-
Check in the vSphere Client GUI. Rescan storage.
If it still does NOT say SSD, reboot the ESXi host.
Then look in the GUI and rerun the command below.
———————————————————————————————-
~ # esxcli storage core device list —device=naa.60060160a89128005a6304b3d121e111
naa.60060160a89128005a6304b3d121e111
Display Name: DGC Fibre Channel Disk (naa.60060160a89128005a6304b3d121e111)
Has Settable Display Name: true
Size: 435200
Device Type: Direct-Access
Multipath Plugin: NMP
Devfs Path: /vmfs/devices/disks/naa.60060160a89128005a6304b3d121e111
Vendor: DGC
Model: VRAID
Revision: 0430
SCSI Level: 4
Is Pseudo: false
Status: on
Is RDM Capable: true
Is Local: false
Is Removable: false
Is SSD: true
Is Offline: false
Is Perennially Reserved: false
Thin Provisioning Status: yes
Attached Filters: VAAI_FILTER
VAAI Status: supported
Other UIDs: vml.020000000060060160a89128005a6304b3d121e111565241494420
———————————————————————————————-
If it still does NOT say SSD, you need to wait. Eventually, the command works and displays as SSD in CLI and the GUI.
More Information:
See the article below:
