Category: Horizon View
Moving a VMware Horizon View virtual desktop between separate Horizon View environments
Requirements:
Sometimes you may build two distinct VMware Horizon View environments for separate business units, for Disaster Recovery, or for testing purposes.
In that case, a need may arise to move a virtual desktop between the independent Horizon View infrastructures.
Assumptions:
There are many ways Horizon View may be configured. However, this article assumes the following settings in both environments:
- Manual, non-automated, dedicated pools for virtual desktops
- Full clone virtual desktops
- All user data is contained inside the virtual desktop, most likely on drive C
- All virtual desktop disks (vmdks, C and others) are contained within the same VM directory on the storage
- Storage is presented to ESXi through the NFSv3 protocol
- Microsoft Active Directory domain is the same across both sites
- VLANs/subnets the same or different between the two sites
- DHCP is configured for the desktop VM in both sites
- Virtual desktop has Windows 7 or Windows 10 operating system
- Connection Servers do not replicate between environments
- No Cloud Pod federation
- Horizon View v7.4
- vCenter VCSA 6.5 Update 1e
- ESXi 6.5 for some hosts and 6.0 Update 3 for other hosts
There are other ways to move a virtual desktop when the Horizon View is setup with automation and Linked Clones, but they are subject for a future article.
The first Horizon View infrastructure will be called “Source” in this article. The second Horizon View infrastructure, where the virtual desktop needs to be moved, will be called “Destination” in this article.
Instructions:
- Record which virtual desktop names are assigned to which Active Directory users on the Source side. You can do that by Exporting a CSV file from the Pool’s Inventory tab.
- If the Source Horizon View infrastructure is still available (not destroyed due to a disaster event), then continue with the following steps on the Source environment. If the Source Horizon View infrastructure has been destroyed due to a disaster, go to Step 9.
- Power off the virtual desktop. Ensure that in Horizon View Manager you don’t have a policy on your pool to keep powering the virtual desktop on.
- In Horizon View Manager, click on the pool name, select the Inventory tab.
- Right click the desktop name and select Remove.
- Choose “Remove VMs from View Manager only.”
- In vSphere Web Client, right click the desktop VM and select “Remove from Inventory.”
- Unmount the NFSv3 datastore that contains the virtual desktop from Source ESXi hosts.
- At this point how the datastore gets from Source to the Destination will vary based on your conditions.
- For example, for testing purposes, the NFSv3 datastore can be mounted on the Destination hosts.
- In case of disaster, there could be storage array technologies in place that replicate the datastore to the Destination side. If the Source storage array is destroyed, go to the Destination storage array and press the Failover button. Failover will usually make the Destination datastore copy Read/Write.
- Add the NFSv3 datastore that contains the virtual desktop to the Destination ESXi hosts, by going through the “New Datastore” wizard in vSphere Web Client.
- Browse the datastore File structure. Go to the directory of the virtual desktop’s VM, find the .vmx file.
- Right click on the .vmx file and select “Register VM…”
- Leave the same name for the desktop VM as offered by the wizard.
- Put the desktop VM in the correct VM folder and cluster/resource pool, that is visible by the Destination’s Horizon View infrastructure.
- Edit the desktop VM’s settings and select the new Port Group that exists on the Destination side (if required).
- Power on the desktop VM from the vSphere Web Client.
- You might get the “This virtual machine might have been moved or copied.” question.
- When vSphere sees that the storage path of the VM does not match what was originally in the .vmx file, you might get this question.
- Answering “Moved” keeps the UUID of the virtual machine, and therefore the MAC address of the network adapter and a few other things.
- Answering “Copied” changes the UUID of the virtual machine, and therefore the MAC address of the network adapter and a few other things.
- In the majority of cases (testing, disaster recovery), you will be moving the desktop virtual machine from one environment to another. Therefore, answer “I Moved It,” to keep the UUID and thus the MAC address the same.
- Wait until the desktop virtual machine obtains the IP address from the Destination’s DHCP server, and registers itself with the DNS server and Active Directory.
- Remember, we are assuming the same Active Directory domain across both sites. As a result, the desktop VM’s AD computer name and object will remain the same.
- Monitor the IP address and DNS assignment from the vSphere Web Client’s Summary tab for the desktop VM.
- In Destination’s Horizon View Manager, click on the Manual, Full Clone, Non-automated, Dedicated pool that you have created already.
- If you did not create the pool yet, create a new pool and put any available VM at the Destination in the pool. The VM that you put will just be a placeholder to create the pool. Once the pool is created, you can remove the placeholder VM and only keep your moved virtual desktops.
- Go to the Entitlements tab and add any user group or users to be entitled to get desktops from the pool. Most likely, it will the the same user group or user that was entitled to the pool on the Source side.
- Select the Inventory tab and click the Add button.
- Add the desktop VM that you just moved.
- Check the status of the desktop VM. First, the status will say “Waiting for agent,” then “In progress,” then “Available.”
- Right click on the desktop VM and select Assign User.
- Select the correct Active Directory user for the desktop.
- As the user to login to the virtual desktop using Horizon View Client or login on behalf of the user.
- For the first login after the move, the user may be asked by Windows to “Restart Now” or “Restart Later.” Please direct the user to “Restart Now.”
- After the restart, the user may utilize the Horizon View Client to login to the Destination’s moved desktop normally.

How to use Adobe Flash Player after its End of Life — absolutely free
***NOW UPDATED with Apple MacOS instructions, in addition to Microsoft Windows***
***Also updated with the solution to the mms.cfg file not working due to the UTF-8 bug***
You may have seen plenty of announcements over the past few years about Adobe Flash coming to the end of life. Various browser manufacturers announced they will disable Flash. Microsoft announced they will uninstall Flash from Windows using a Windows Update (although only the Flash that came automatically with Windows, NOT user-installed Flash). Apple completely disabled Flash in Safari. Below is the dreaded Flash End of Life logo that you will see once Flash is finally turned off:

Yes, I agree with Steve Jobs — Flash is buggy and not secure. However, there are many IT manufacturers out there that used Flash to build their management software interfaces. Some common examples are VMware vSphere, Horizon, and HPE CommandView. That management software is not going away, even though most of it is older. In fact, some of these Flash-managed devices will be there for the next 10 years. So, what can the desperate IT administrator do to manage his or her devices?
Adobe sends users for extended Flash support to a company called Harman. HPE charges money for older CommandView support. Do not pay any money to these companies to use Flash.
Preparation
I am not recommending Chrome or Edge browsers for the below solution because they will auto-update and newer versions will not support Flash at all. Further, turning off auto-update in Chrome and Edge is difficult.
Here are 3 methods to get Flash running on your favorite website. Windows methods assume 64-bit Operating systems. If you want to try 32-bit Windows, the files are available, but the functionality has not been tested (although it will probably work). All the files talked about in these methods are downloadable below:
firefox-flash-end-solution-versions.zip_.pdf — Right click on the link and choose “Save Link As” or “Download Linked File As”. Save the file to your computer. Unhide file extensions. Remove _.pdf from the end of the name and Unzip/ExtractAll the file.
The file contains:
policies.json
Firefox Setup 78.6.0esr-64bit.exe
Firefox Setup 78.6.0esr-32bit.exe
Firefox 78.6.0esr.dmg
flash-eol-versions.zip_-1.pdf — Right click on the link and choose “Save Link As” or “Download Linked File As”. Save the file to your computer. Unhide file extensions. Remove _-1.pdf from the end of the name and Unzip/ExtractAll the file.
The file contains:
mms.cfg
Flash player for Firefox and Win7 – use this for Solution: install_flash_player.exe
Flash for Safari and Firefox – Mac: install_flash_player_osx.dmg
Flash for Opera and Chromium – Mac: install_flash_player_osx_ppapi.dmg
Flash Player for Chromium and Opera browsers: install_flash_player_ppapi.exe
Flash Player for IE active x: install_flash_player_ax.exe
Flash Player Beta 32 bit – May 14-2020: flashplayer_32_sa.exe flashplayer_32_sa.dmg
flash_player_32_0_admin_guide.pdf
Method 1 — Microsoft Windows, if you have Internet Explorer browser and Flash already installed
This method applies to many older Windows Operating systems like Server 2008, 2012, 2016 and Windows 7 and even older Windows 10. It assumes a 64-bit operating system.
- Do NOT upgrade Internet Explorer to the Microsoft Edge browser.
- Set Internet Explorer to be the default browser in Default Programs.
- Download the mms.cfg file.
- Open the mms.cfg file with Notepad.
- Edit the URL on the right of the Equals sign with an address of the Flash website or file that you need.
- Ex. AllowListUrlPattern=https://localhost/admin/
- If you need additional websites, place them on the next lines, like in this example.
- AllowListUrlPattern=https://localhost/admin/
- AllowListUrlPattern=http://testwebsite.com/
- AllowListUrlPattern=*://*.finallystopflash.com/

- Save mms.cfg file on the desktop.
- Important: if you did not use my file, but you are creating the file yourself, makes sure in Notepad Save As dialog, you select “All Files” as the type, and “UTF-8” as the Encoding.
- Copy the mms.cfg file into the following directory: C:\Windows\SysWOW64\Macromed\Flash\
- That disables Flash updates and allows to use Flash on specified websites.
- If you don’t see this directory, it means Flash is not installed and you need to use Method 2 instead.
- Restart the Internet Explorer browser.
- Go to your website.
- This will open Internet Explorer with Flash functional.
Method 2 — Microsoft Windows, if you don’t have Internet Explorer and/or Flash installed
This method applies to almost any Windows machine. It assumes a 64-bit operating system.
- If you already have another version of Firefox installed, uninstall it.
- Download the “Firefox Setup 78.6.0esr-64bit.exe” and “policies.json” files. This Firefox installer is the Enterprise version (what you need).
- Install Firefox ESR, but do NOT open it, or if it opens, close right away.
- In the “C:\Program Files\Mozilla Firefox\” directory, create a folder called “distribution”
- Put “policies.json” file into the folder “distribution” — this disables automatic Firefox updates.
- Start Firefox ESR.
- Go to URL: about:policies
- Check that “DisableAppUpdate” policy is there and it says “True”.
- Set Firefox to be the default browser in Default Programs.
- Download “Flash player for Firefox and Win7 – use this for Solution: install_flash_player.exe” and “mms.cfg”.
- Double click on the install_flash_player.exe to install Flash for Firefox. Click all Next prompts.
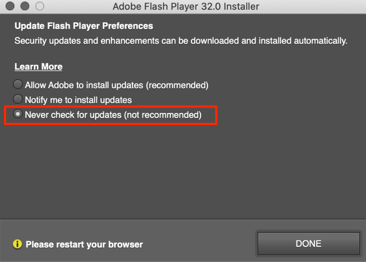
- If you are prompted to choose “Update Flash Player Preferences”, select “Never Check for Updates”.
- Open mms.cfg file with Notepad
- Edit the URL on the right of the Equals sign with an address of the Flash website or file that you need.
- Ex. AllowListUrlPattern=https://localhost/admin/
- If you need additional websites, place them on the next lines, like in these examples:
- AllowListUrlPattern=https://localhost/admin/
- AllowListUrlPattern=http://testwebsite.com/
- AllowListUrlPattern=*://*.finallystopflash.com/
- Save mms.cfg file on the desktop.
- Important: if you did not use my file, but you are creating the file yourself, makes sure in Notepad Save As dialog, you select “All Files” as the type, and “UTF-8” as the Encoding.
- Copy the “mms.cfg” file into the following directory: C:\Windows\SysWOW64\Macromed\Flash\
- That disables Flash updates and allows to use Flash on specified websites.
- Restart Firefox ESR.
- When going to the flash website you specified, click on the big logo in the middle, then “Allow”.
Method 3 — Apple MacOS
This method applies to almost any MacOS version.
- If you already have another version of Firefox installed, uninstall it.
- Download “Firefox 78.6.0esr.dmg” and “policies.json” files. This Firefox ESR for Mac installer is the Enterprise version (what you need).
- Open the DMG file. Drag the Firefox ESR icon to the Applications folder, which installs it on the Mac. Do NOT open Firefox ESR yet.
- Open the Terminal application.
- Type the following and press Enter (start typing from xattr).
- xattr -r -d com.apple.quarantine /Applications/Firefox.app
- This allows Firefox customization without corrupting the application.
- xattr -r -d com.apple.quarantine /Applications/Firefox.app

- Go to the Applications folder.
- Right click on the Firefox.app application and select “Show Package Contents”.
- Go to Contents>Resources folder and when there create a folder called “distribution”.
- Put “policies.json” file into the folder “distribution” — this disables automatic Firefox updates.

- Start Firefox ESR.
- Go to URL: about:policies
- Check that “DisableAppUpdate” policy is there and it says “True”.
- Download “Flash for Safari and Firefox – Mac: install_flash_player_osx.dmg” and “mms.cfg”.
- Double click on the install_flash_player_osx.dmg to mount the disk. Double click the installer to install Flash for Firefox.
- When asked to choose on “Update Flash Player Preferences”, select “Never Check for Updates (not recommended)”.
- Place the mms.cfg file on the Desktop. Open mms.cfg file with TextEdit.
- Edit the URL on the right of the Equals sign with an address of the Flash website or file that you need.
- Ex. AllowListUrlPattern=https://localhost/admin/
- If you need additional websites, place them on the next lines, like in these examples:
- AllowListUrlPattern=https://localhost/admin/
- AllowListUrlPattern=http://testwebsite.com/
- AllowListUrlPattern=*://*.finallystopflash.com/

- Save mms.cfg file to the Desktop. Copy the mms.cfg file.
- Paste the “mms.cfg” file into the following directory:
- /Library/Application Support/Macromedia/ (Mac Hard Drive>Library>Application Support>Macromedia)
- If there is already an existing mms.cfg file in there, Replace it.
- That disables Flash updates and allows to use Flash on specified websites.

- Restart Firefox ESR for Mac.
- When going to the flash website you specified, click on the big logo in the middle, then “Allow”.
References
https://support.mozilla.org/en-US/questions/1283061
https://community.adobe.com/t5/flash-player/adobe-flash-availability-after-2020/td-p/10929047?page=1
https://support.mozilla.org/en-US/kb/deploying-firefox-customizations-macos
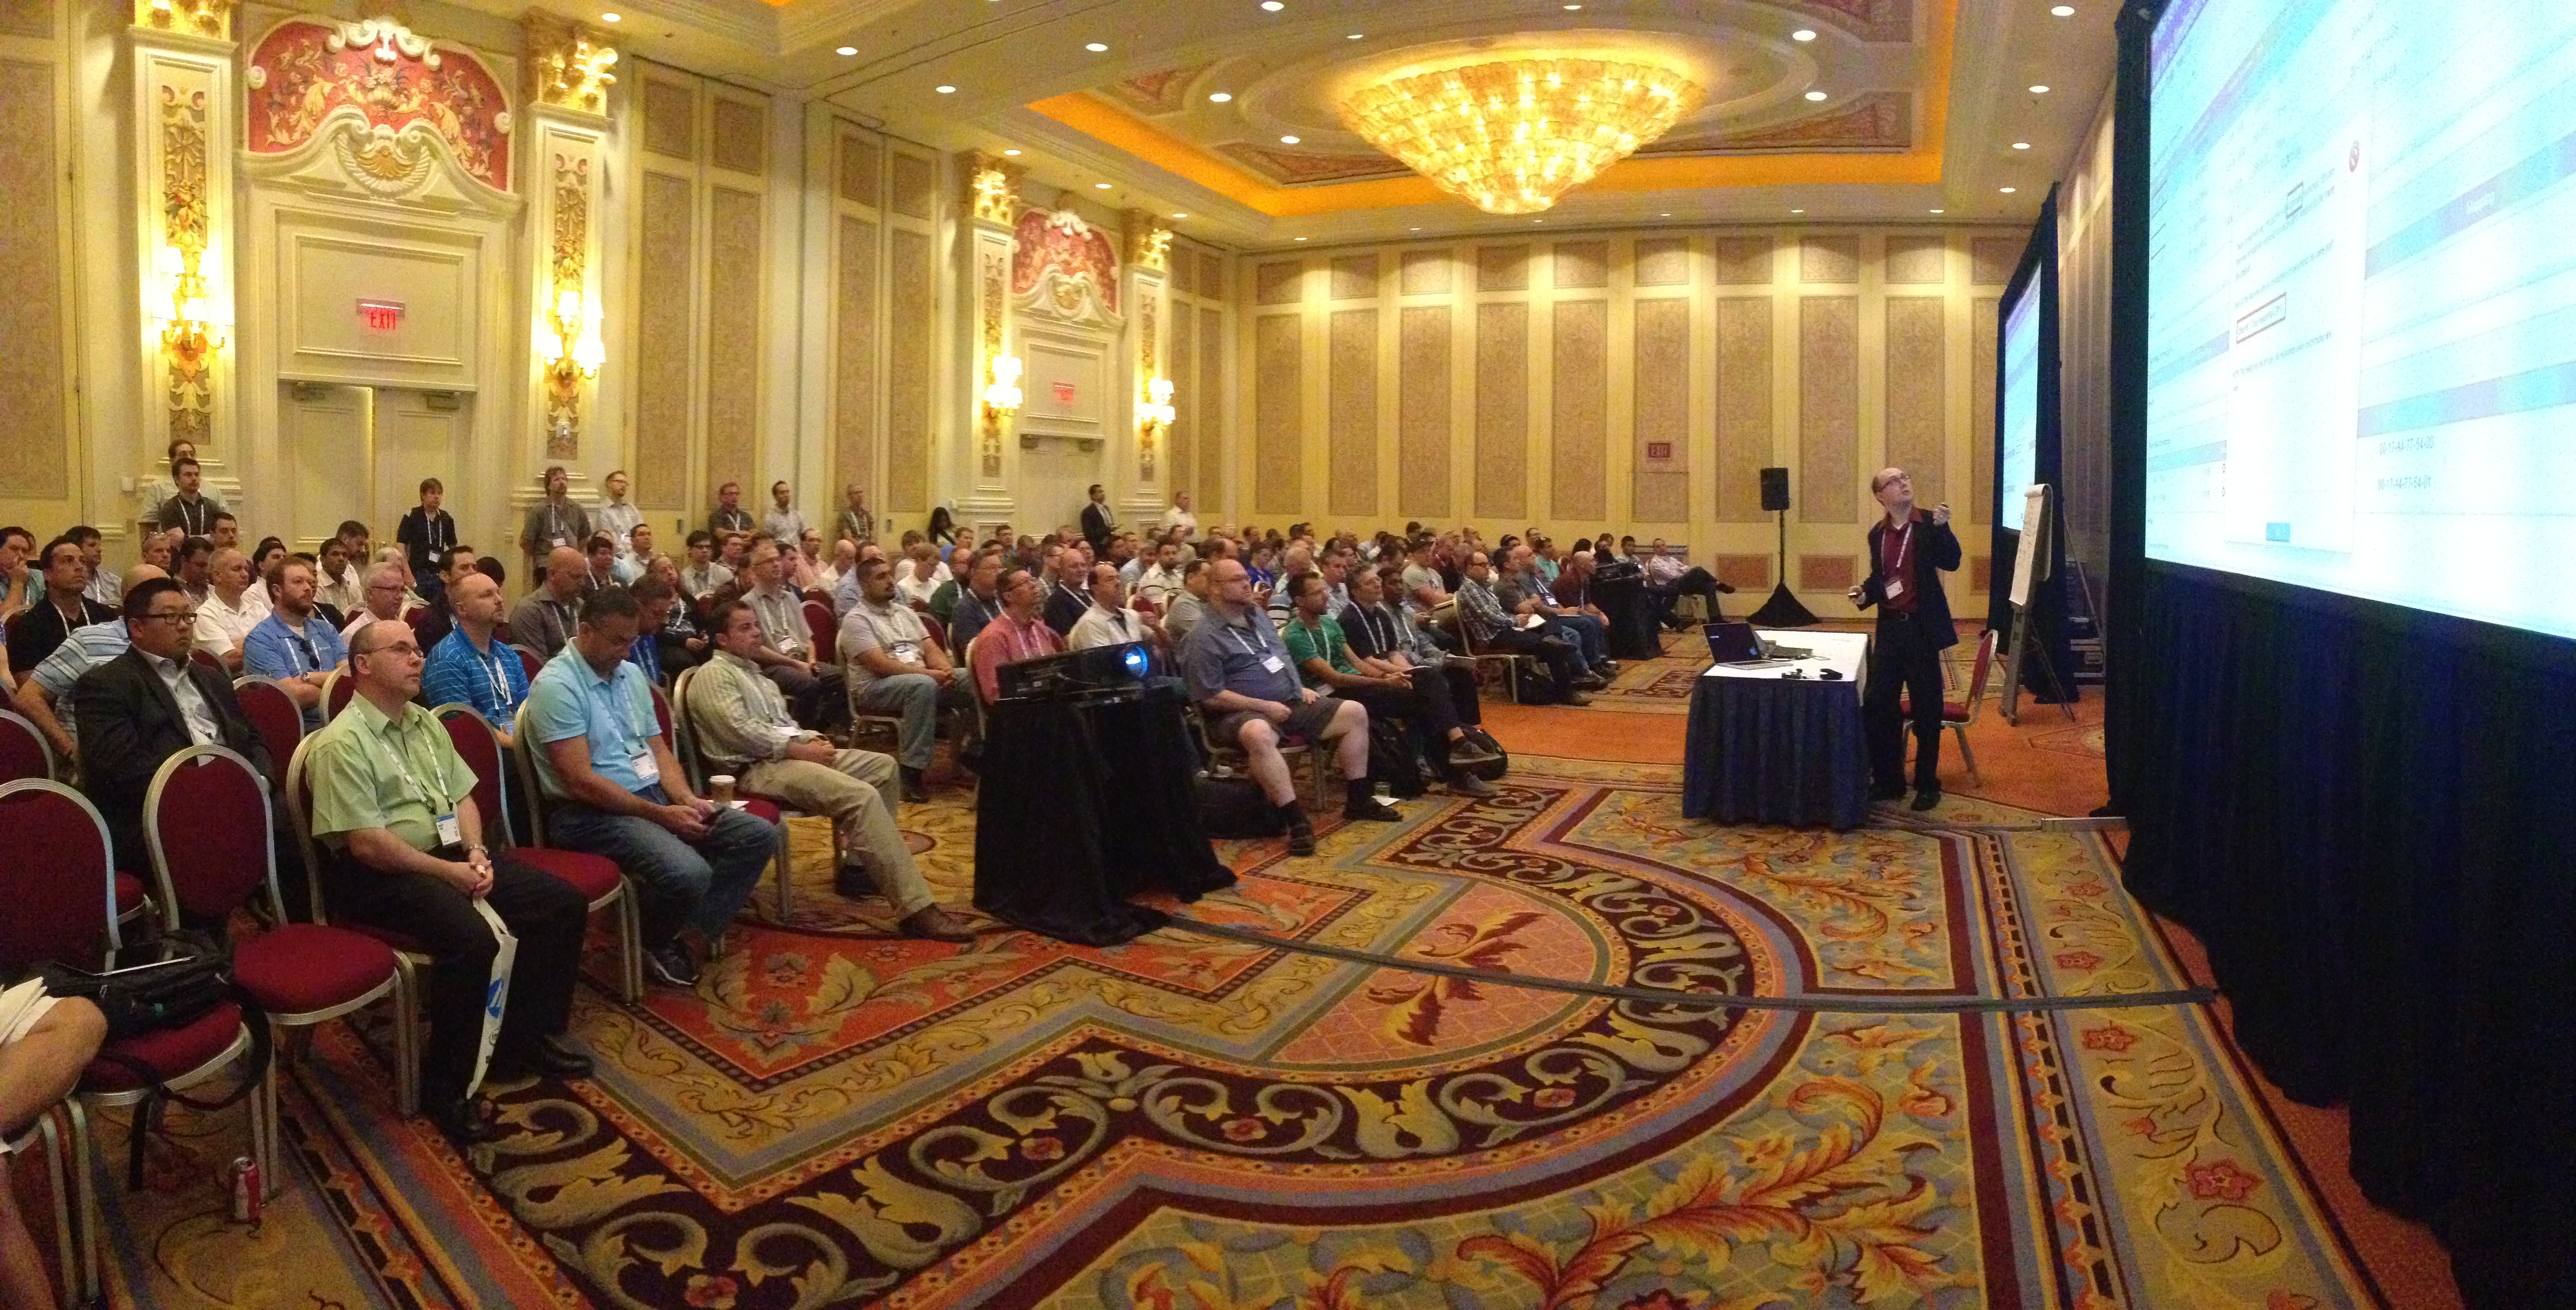
Collateral for my presentation at the New Jersey VMware User Group (NJ VMUG)
I was delighted at the chance to present at the New Jersey VMware User Group (NJ VMUG). The attendees posed excellent questions.
Thank you much to Ben Liebowitz for the invitation.
My presentation is called “Virtual Desktop (VDI) Performance Troubleshooting”
Here are the slides for the session:
Virtual Desktops (VDI) on an Airplane
Recently, while flying on United Airlines I noticed the WiFi sign on the seat in front. I never used WiFi on planes before, so I thought it would be expensive. Imagine my surprise when it was cheap. It was probably cheap to compensate the absence of TV displays.
I immediately thought of our CDI Virtual Desktop (VDI) lab in Teterboro, NJ (USA). Would the Virtual Desktop even be usable? How will video run? I connected immediately, started recording my screen and opened my Virtual Desktop. It worked! Everything except video worked well.
My idea came because of Michael Webster, who has already tried doing this and wrote about it. I also wanted to do it in the Gunnar Berger style of protocol comparison. So, for your viewing pleasure — Virtual Desktops (VDI) on an Airplane.
——
Description:
This video is a demonstration of the Virtual Desktop (VDI) technology, located at CDI in Teterboro, NJ (USA) being accessed from an airplane 34,000 feet (10 km) high. Virtual Desktops allow you to use your Windows desktop from anywhere — even on satellite based WiFi. You will see PCoIP and HTML5 tests, Microsoft Word, HD video, YouTube video and vSphere client utilization.
Demonstration: Yury Magalif.
Lab Build: Chris Ruotolo.
Connecting From: Random clouds above Missouri, USA
Equipment and Software used:
VMware View
VMware vSphere
Cisco C-series servers.
EMC XtremIO all flash storage array.
10Zig Apex 2800 PCoIP acceleration card with a Teradici chip.
Inspired by:
Michael Webster’s blog article:
The VMware View from the Horizon at 38,000 Feet and 8000 Miles Away
Gunnar Berger’s low-latency VDI comparison video:
Collateral for my presentation at the Workshop of the Association of Environmental Authorities of NJ (AEANJ)
I was glad for a chance to present at the Workshop of the Association of Environmental Authorities of NJ (AEANJ). There were great questions from the audience.
Thank you to attendees, Leon McBride for the invitation, Peggy Gallos, Karen Burris, and to my colleague Lucy Valle for videotaping.
My presentation is called “Data Portability, Data Security, and Data Availability in Cloud Services”
Here are the collateral files for the session:
Slides:
AEANJ Workshop 2016-slides-YuryMagalif
Video:
Collateral for my presentation at the NJ CTO Study Council
This was my first time presenting at the new NJ CTO Study Council event, and it was a wonderful experience. We did a Virtual Desktop demo which worked flawlessly.
Thank you to attendees and my speaking partners Dr. Richard O’Malley, Ralph Barca, Stan Bednarz, Dan Riordan, and to my colleagues Jeff Jackson and Ian Erikson for help with the presentation.
My presentation is called “Virtualization Roadmap through K-12”
Here are the collateral files for the session:
Slides:
NJ CTO Study Council – VIRTUALIZATION – ROADMAP THROUGH K12 – November 2014
Slides from my session at the BriForum 2014 conference
 Thank you to those who attended my session at BriForum 2014 in Boston and filled out the survey!
This is my 2nd year speaking. I hope to be back next year.
Here is the session presentation slide deck:
AgentlessAntivirusTips&Tricks_YuryMagalif_July2014_BriForum_v3
Here is the link to the session description on the BriForum website:
http://briforum.com/US/sessions.html#tipstricks
This year, the conference in Boston was excellent. I got a chance to meet Brian Madden (pictured at left), Gabe Knuth, Jack Madden and the TechTarget crew. In addition, I met many amazing people who are the top experts in End-User Computing –Benny Tritsch, Shawn Bass, ProjectVRC team: Jeroen van de Kamp, Ryan Bijkerk & Ruben Spruijt.
In particular, Benny and Shawn’s HTML5 comparison session and ProjectVRC comparative testing session were the highlights of the conference for me.
In my own session, I was successful with a demo of McAfee and had a good number of questions from the audience. Stay tuned for the video, coming in August of 2014.
My presentation is called “Tips and Tricks on Building Agentless Antivirus Scanners for VMware View Virtual Desktops”
This tips and techniques session is best for administrators and consultants looking to implement an Antivirus solution for their VMware Virtual Desktop Infrastructure (VDI). The goal is to minimize I/O impact to VDI. We will discuss the two most developed scanners taking advantage of VMware vShield Endpoint application programing interfaces (APIs), Trend Micro Deep Security Antivirus 9.0 and McAfee Agentless MOVE AntiVirus 3.0. New this year is the discussion of VM-based scan policies. Overall, we will focus on real-world examples of VMware, Trend Micro and McAfee best practices. For example, the participants will learn whether to use their current Antivirus for VDI versus VDI agentless antivirus, why the VM Communication Interface (VMCI) driver is important, how to deploy the Security Virtual Appliances (SVAs), why you should disable VMotion for SVAs, how to test your solution using EICAR test files and how to shut down your VDI agentless antivirus VMs properly if doing maintenance. A basic understanding of VMware vSphere, VMware View and Enterprise Antivirus solutions is recommended.
Attendees will learn:
• How to minimize AntiVirus scanning I/O impact to VDI
• Whether to use your current AntiVirus versus VDI agentless Antivirus
• How to pick the best AntiVirus vendor for your environment
• How to test your agentless AntiVirus for effectiveness using EICAR files
• How to deploy and maintain your Trend Micro or McAfee infrastructure
Please send me any remaining questions that come up.
Collateral for my session at the HP Discover 2014 conference
Thank you to the 260 people who attended my session and filled out the survey!
I am very grateful that you keep coming to hear what I have to say and hope to be back next year.
My presentation is called “TB3306 – Tips and tricks on building VMware vSphere 5.5 with BladeSystem, Virtual Connect, and HP 3PAR StoreServ storage”
Returning for the sixth year in a row, this tips-and-techniques session is for administrators and consultants who want to implement VMware ESXi 5.5 (vSphere) on HP c-Class BladeSystem, Virtual Connect, and HP 3PAR StoreServ storage. New topics will include the auto-deployment of domain configurations and Single Root I/O Virtualization (SR-IOV) for bypassing vSwitches. The session will focus on real-world examples of VMware and HP best practices. For example, you will learn how to load-balance SAN paths; make Virtual Connect really “connect” to Cisco IP switches in a true active/active fashion; configure VLANs for the Virtual Connect modules and virtual switches; solve firmware and driver problems. In addition, you will receive tips on how to make sound design decisions for iSCSI vs. Fibre Channel, and boot from SAN vs. local boot. To get the most from this session, we recommend attendees have a basic understanding of VMware ESX, HP c-Class BladeSystem, and Virtual Connect.
Here are the collateral files for the session:
Slides:
Use #HPtrick hashtag to chat with me on Twitter:
June 16, 2014 — Monday, 2-3 pm Eastern Standard Time (11 am – 12 pm Pacific Standard Time).
VMware announces VSAN to be released around March 10th.
 Ben Fathi, the CTO of VMware announced the Virtual Storage Area Network (VSAN) feature in vSphere ESX on March 6, 2014.
VSAN is a storage technology that pools all local disks on multiple servers into one large distributed volume. Caching is done via an SSD drive.
Unfortunately, licensing and pricing details get released at VSAN General Availability around March 10th.
Out of the door, the VSAN will have the following features:
- Full support for VMware Horizon / View (no VSAN inside View — yet)
- Up to 32 nodes.
- Up to 2 million IOPS.
- 4.5 PB of space.
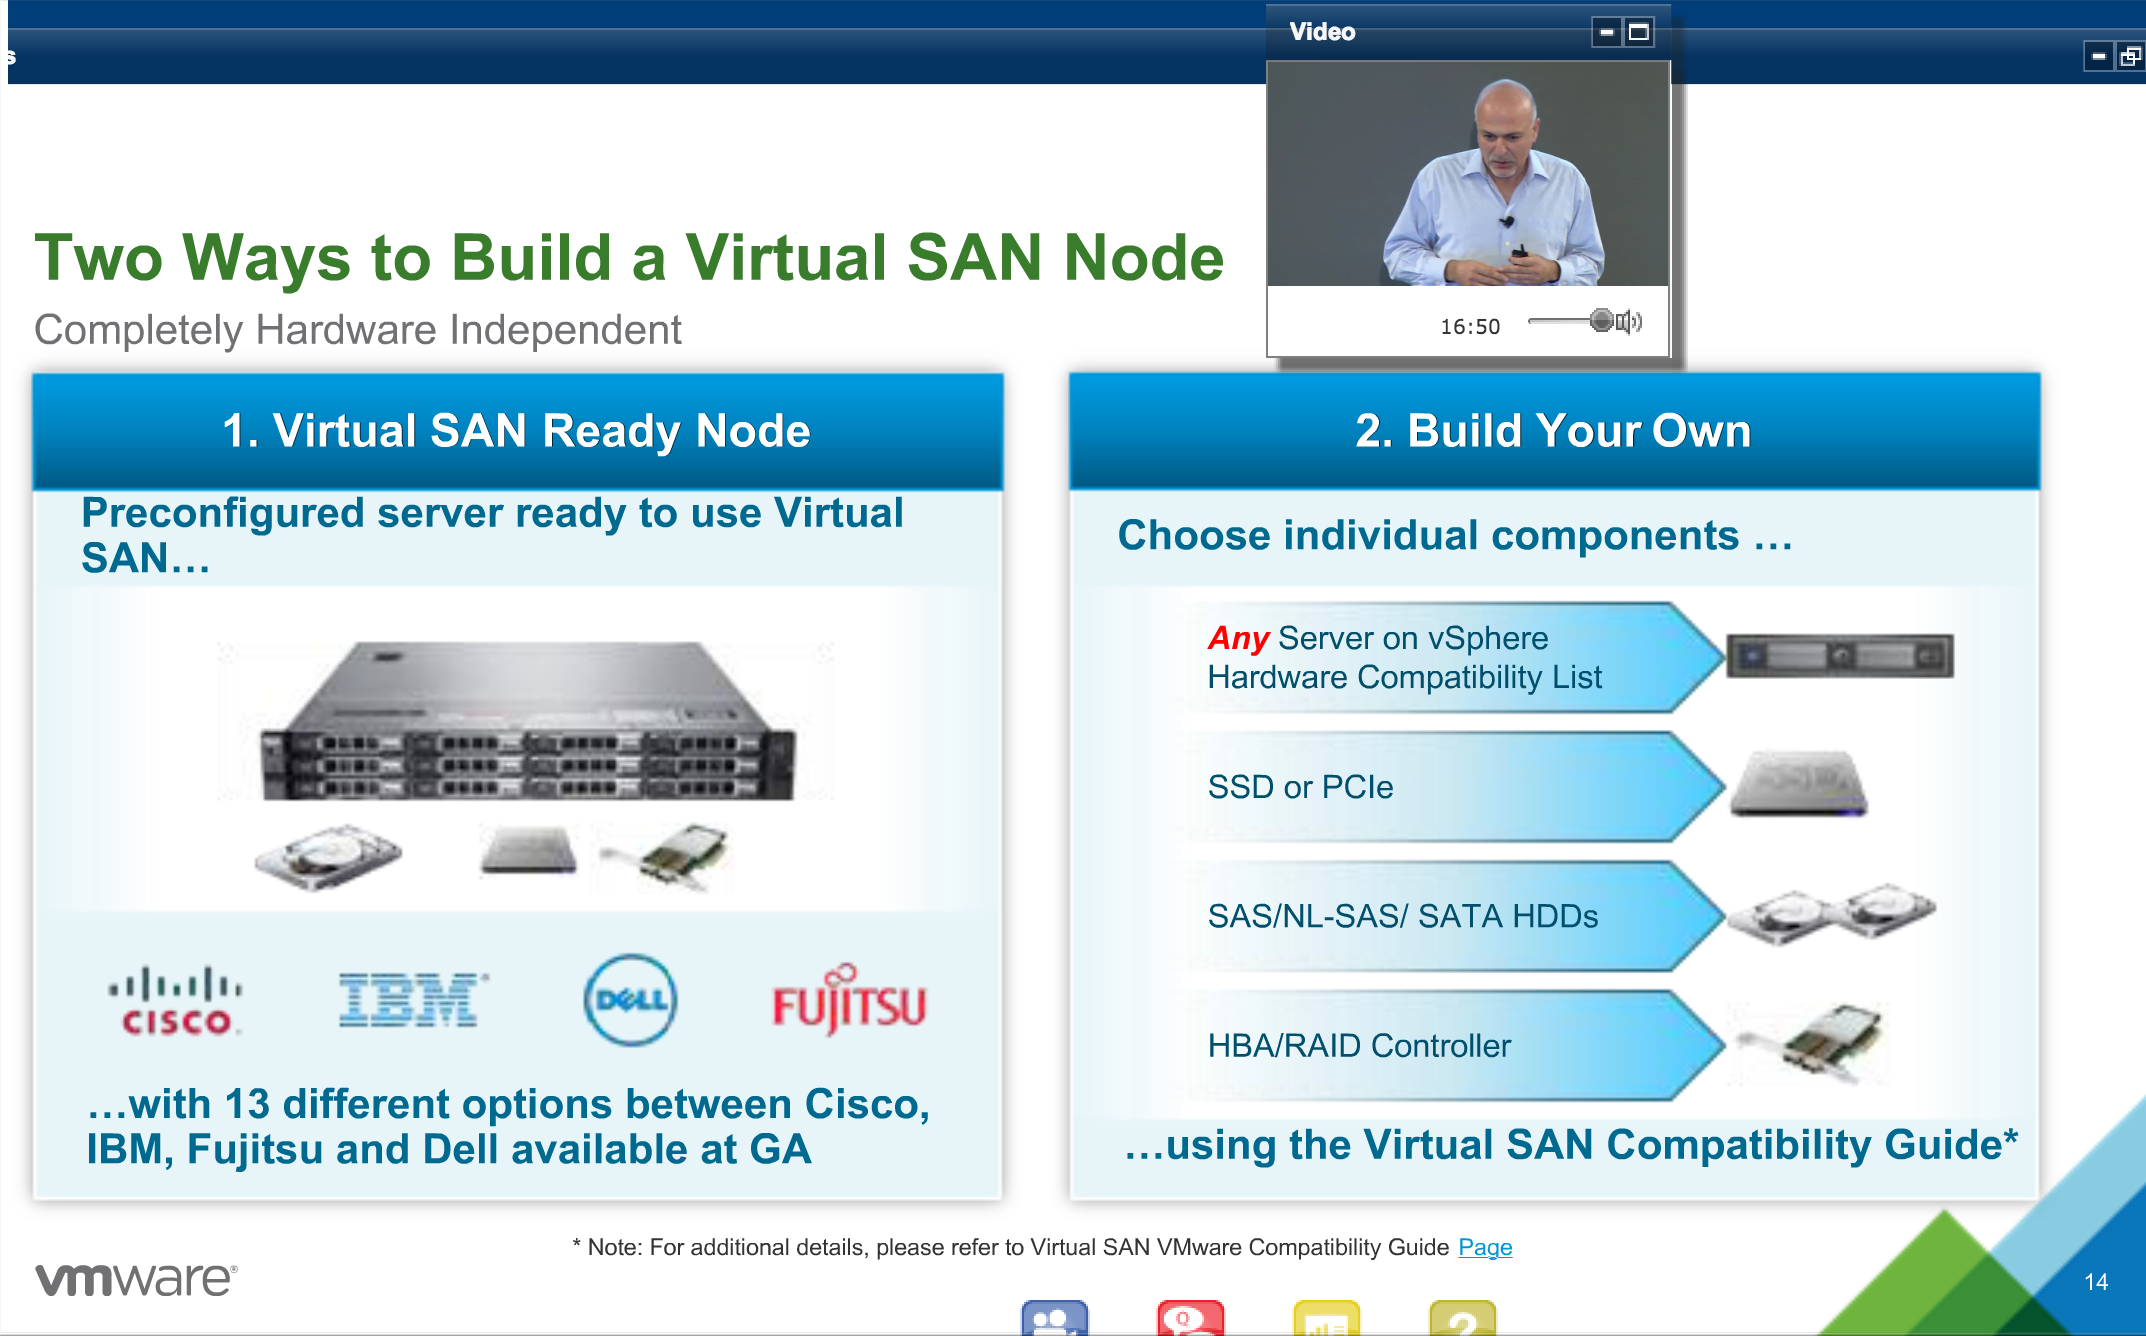
- 13 VSAN Ready Node configurations at launch using Cisco, IBM, Fujitsu or Dell servers.
- Build your own supported.
However, VSAN will also have the following requirements:
- At least 1 SSD drive.
- Up to 7 mechanical drives.
- Cannot use all SSDs or SAN storage.
- SSD must be at least 10% of space.
- Need ESXi 5.5 Update 1.
VSAN competitors:
- EMC’s ScaleIO — can build distributed storage on any OS out there (Windows, Linux plus VMware) and more nodes (per Duncan Epping).
- Nutanix — server, storage, VMware in a customized box.
- Simplivity — same concept as Nutanix.
- Pivot3 — same concept as Nutanix.
- Virtual Storage Appliance (VSA) solutions (VMware own VSA, Atlantis, HP Lefthand VSA, etc.).
- Regular storage arrays.
- Flash only storage arrays (XtremIO, EMC VNX-F, Cisco’s Whiptail/Invicta)
Analysis:
There is a lot of interest in VSAN. The beta had more than 10,000 people sign up. Some VMware partners around the country are preparing solutions already, ready to sell to eager customers.
However, everything depends on how it’s licensed and priced. The price has to be lower than traditional storage and even VSA solutions (except maybe VMware’s VSA). Only then it will make sense for the smaller customer.
Otherwise, especially for lower end Virtual Desktop Infrastructure (VDI), the VSAN is perfect — easy to set up (one checkbox), minimum of only 3 servers, provides enough IOPS with SSD caching. We are planning to use it for VDI.
Collateral for my session at the BriForum 2013 conference
 Thank you to those who attended my session at BriForum 2013 and filled out the survey! I hope to be back next year.
Here is the session presentation slide deck:
AgentlessAntivirusTips&Tricks_YuryMagalif_July2013_BriForum_v7
Here is the link to the session description on the BriForum website:
http://briforum.com/US/sessions.html#ymagalifAntivirus
My presentation is called “Tips and Tricks on Building Agentless Antivirus Scanners for Virtual Desktops”
This tips and techniques session is best for administrators and consultants looking to implement an Antivirus solution for their VMware Virtual Desktop Infrastructure (VDI). The goal is to minimize I/O impact to VDI. We will discuss the two most developed scanners taking advantage of VMware vShield Endpoint application programing interfaces (APIs) – Trend Micro Deep Security Antivirus and McAfee Agentless MOVE AntiVirus. Specifically, we will focus on real-world examples of VMware, Trend Micro and McAfee best practices. For example, the participants will learn whether to use their current Antivirus for VDI versus VDI agentless antivirus, why the VM Communication Interface (VMCI) driver is important, how to deploy the Security Virtual Appliances (SVAs), why you should disable VMotion for SVAs, how to test your solution using EICAR test files and how to shut down your VDI agentless antivirus VMs properly if doing maintenance. A basic understanding of VMware vSphere, VMware View and Enterprise Antivirus solutions is recommended.
Please send me any remaining questions that come up.
